材料准备
- AmebaD [ AMB23 / AMB21 / AMB22 / BW16 / AW-CU488 Thing Plus ] x 1
Google Cloud IoT 设置
在Google Cloud Console中,选择一个现有项目或创建一个新项目。您需要Project ID 才能与Ameba一起使用。
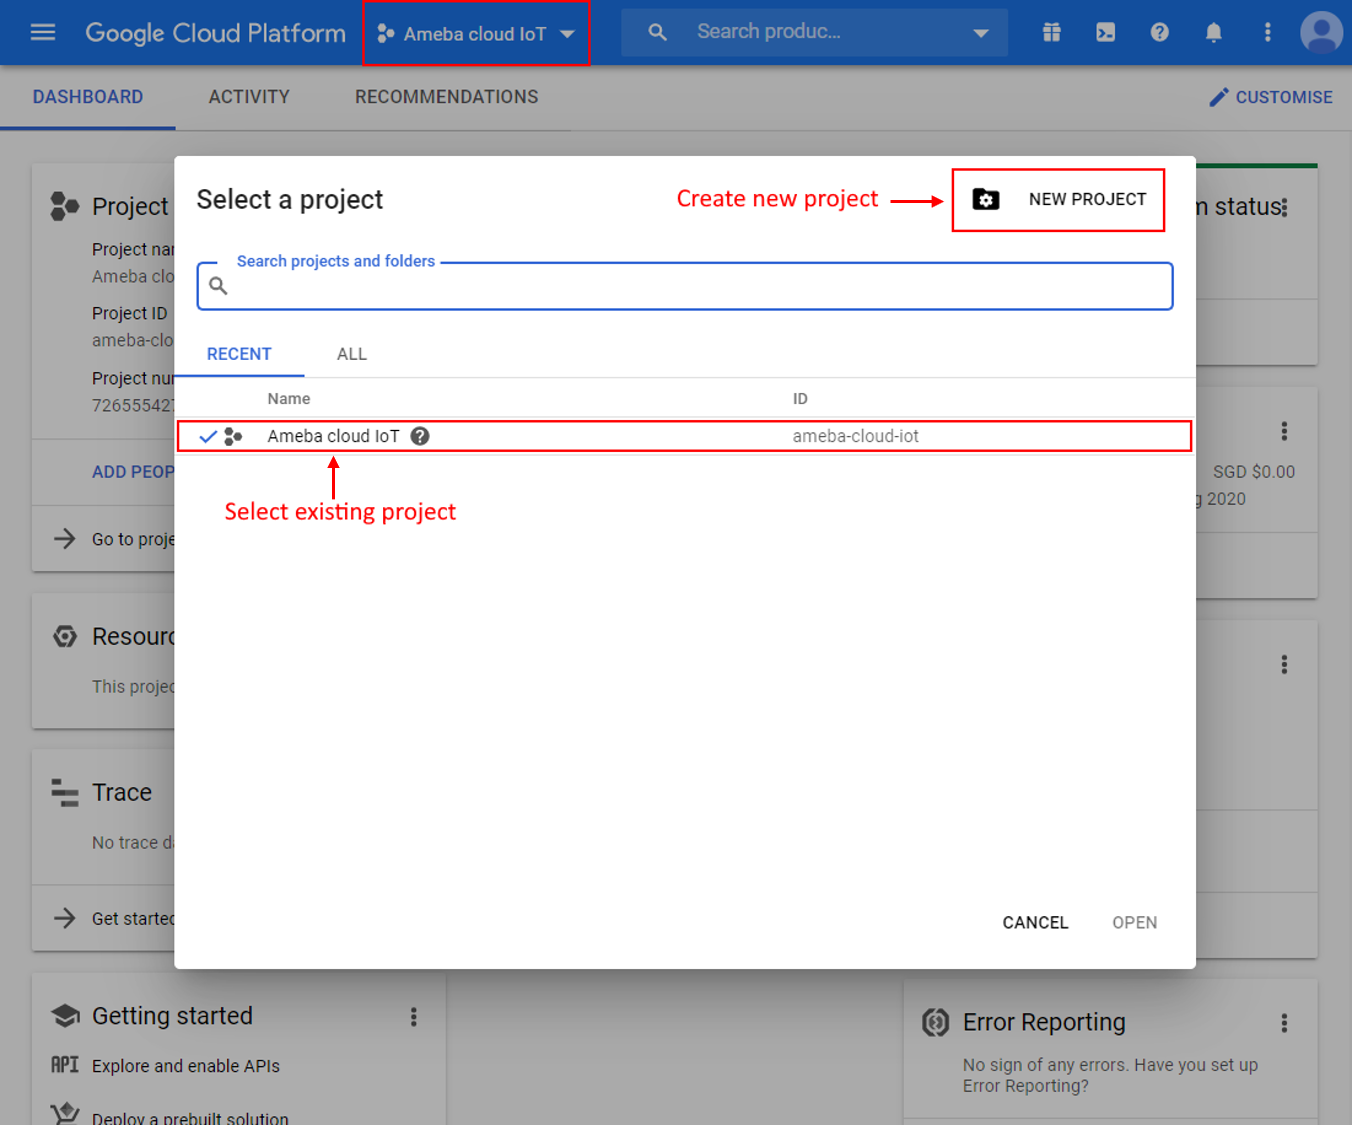
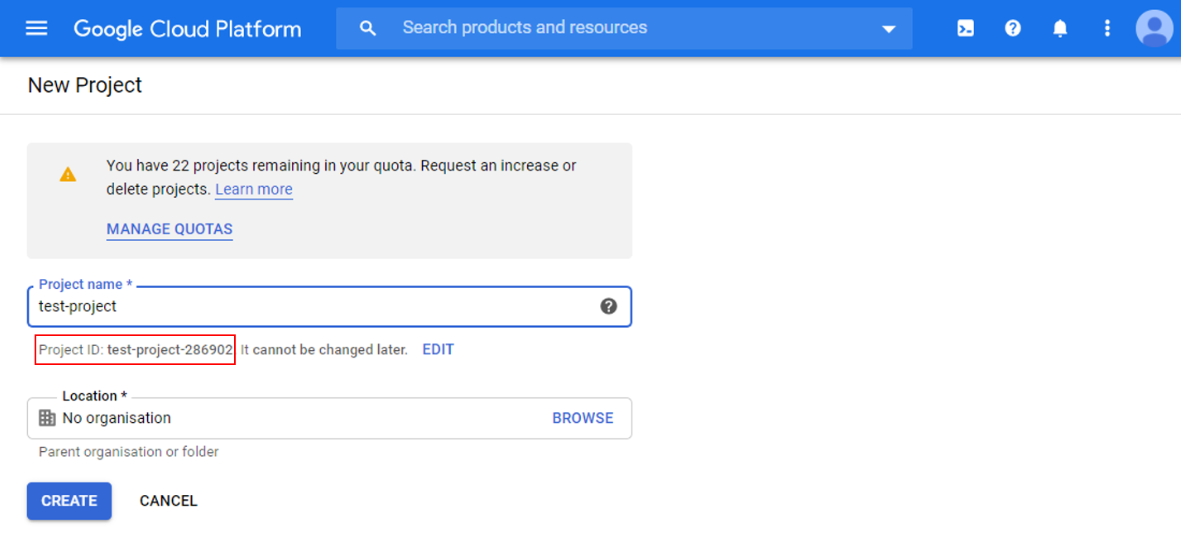
如果创建新项目,请输入项目名称,并记下生成的 Project ID 。
2. 为您的项目启用计费
需要为您的项目启用结算功能,才能使用Google Cloud Platform功能。请遵循Google云端文档中的指南以启用计费。
https://cloud.google.com/billing /docs/how-to/modify-project
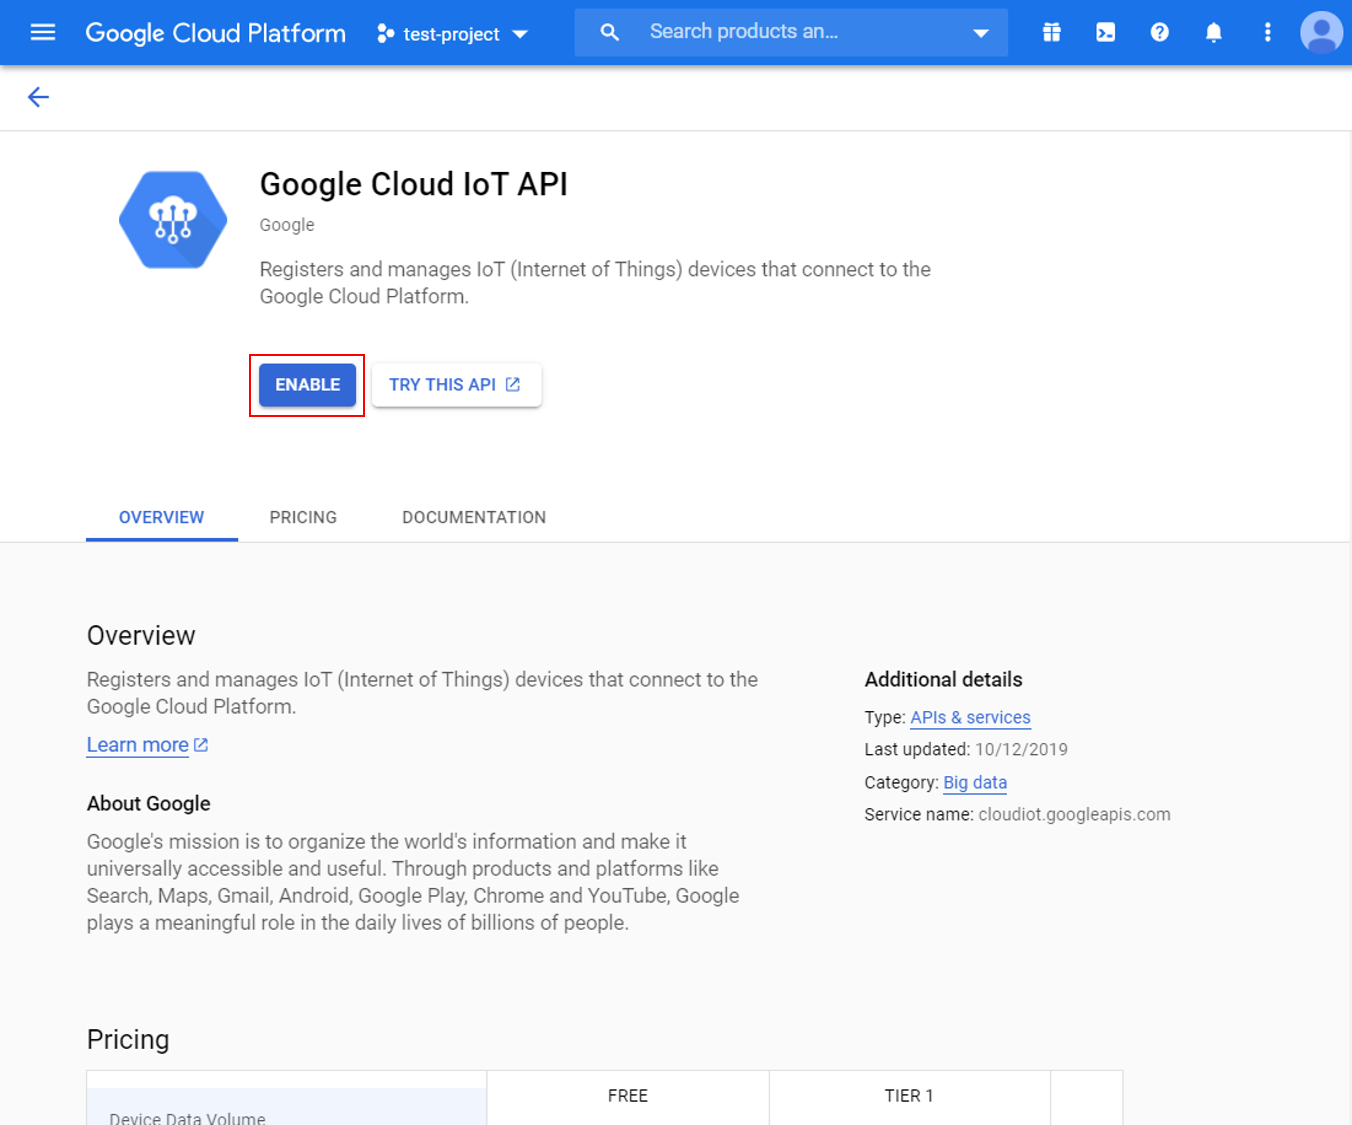
3. 启用 Cloud IoT Core API
在Google Cloud控制台中,单击左上方的菜单按钮,然后搜索IoT Core。

点击启用,为您的项目激活Google Cloud IoT API。
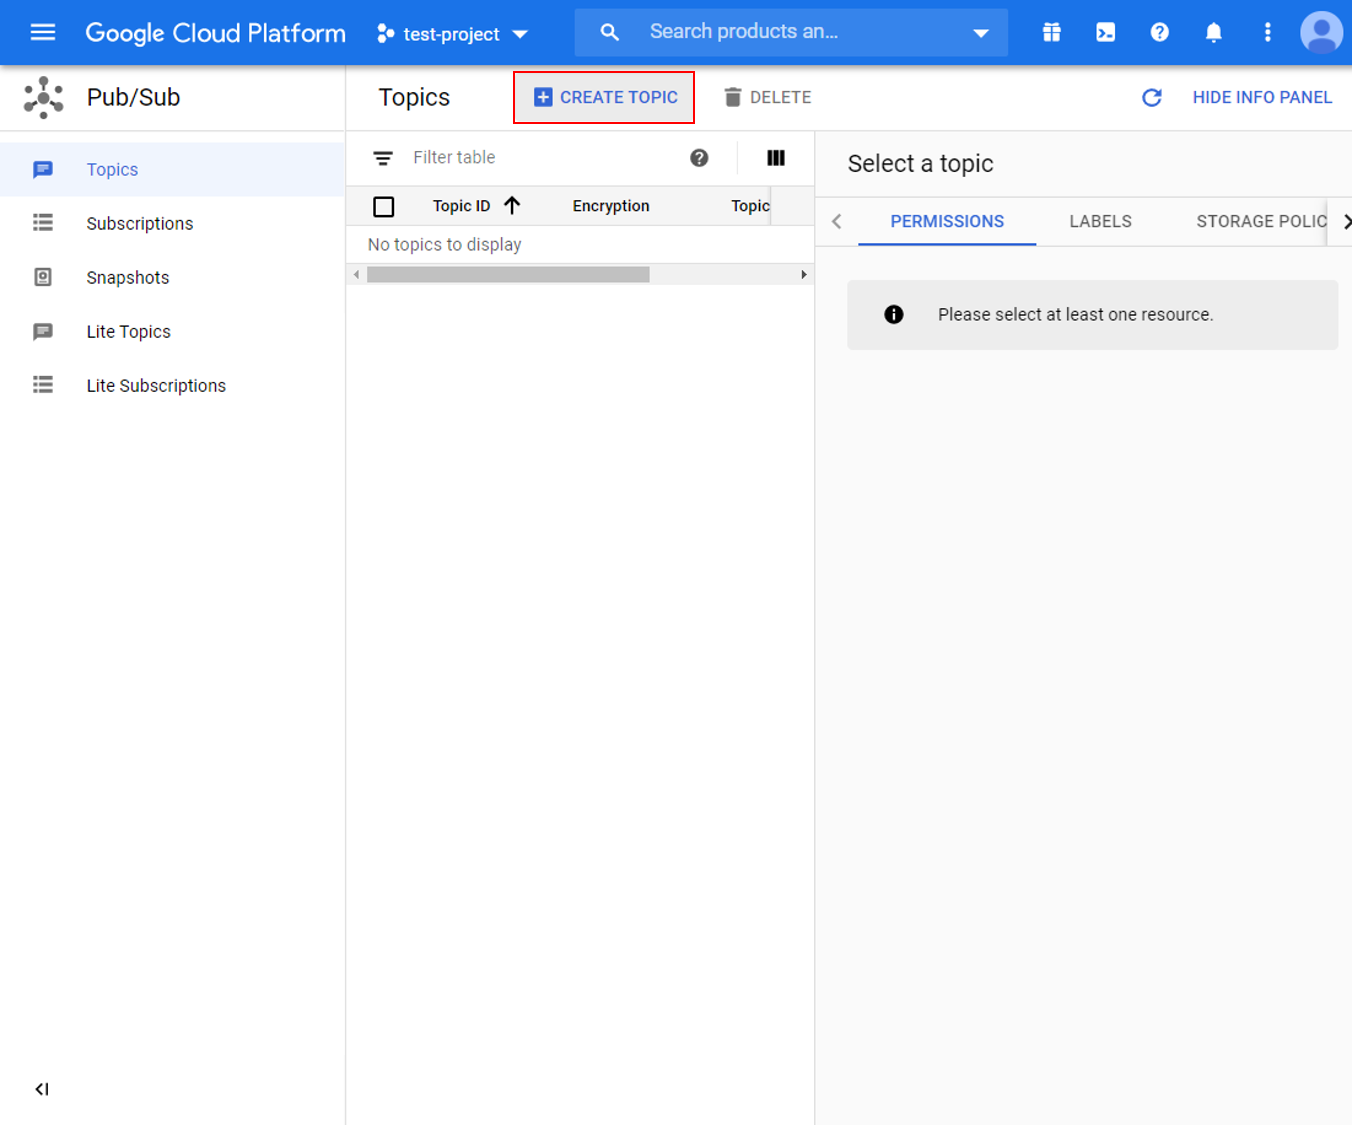
4. 创建一个Cloud Pub / Sub主题
在Google Cloud控制台中,单击左上方的菜单按钮,然后搜索Pub/Sub。
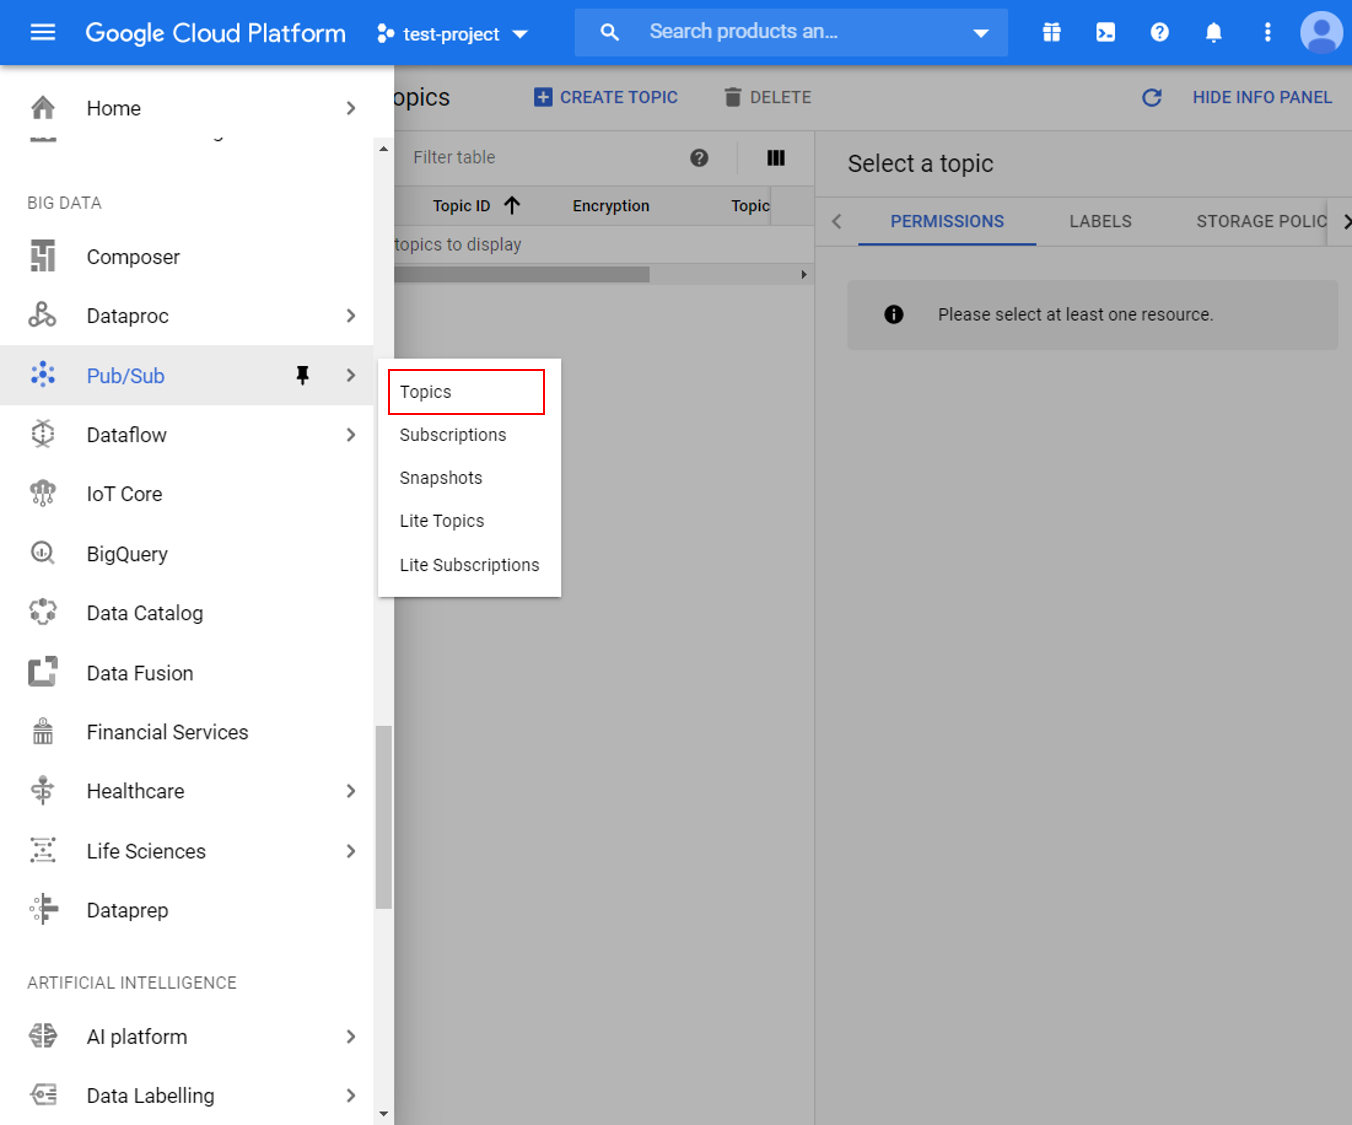
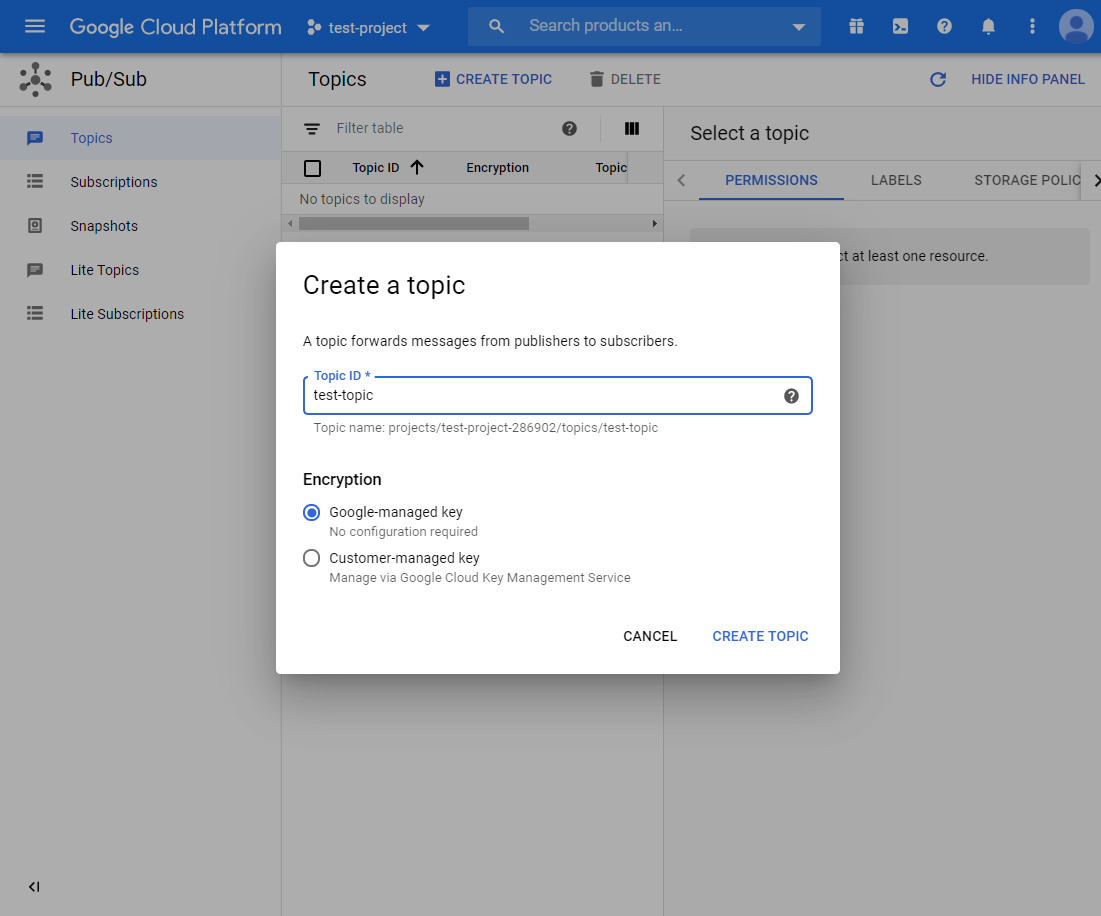
为您的项目创建一个新主题,并为其指定合适的主题ID。
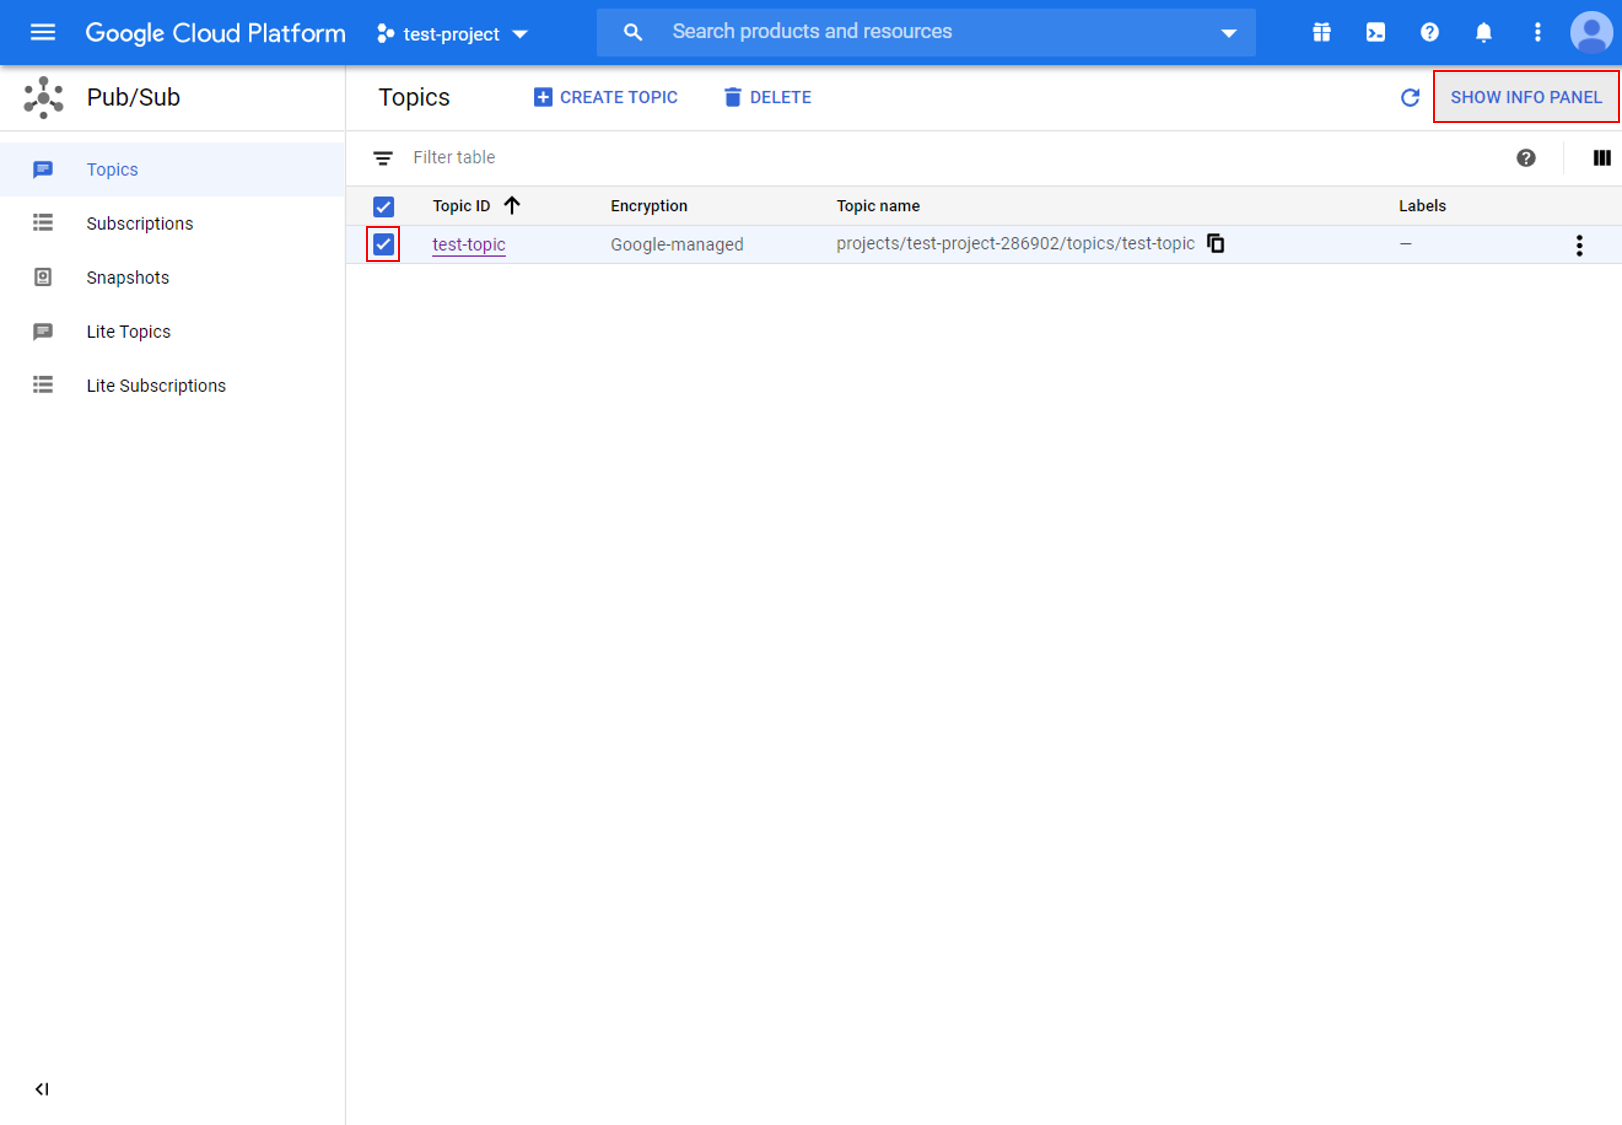
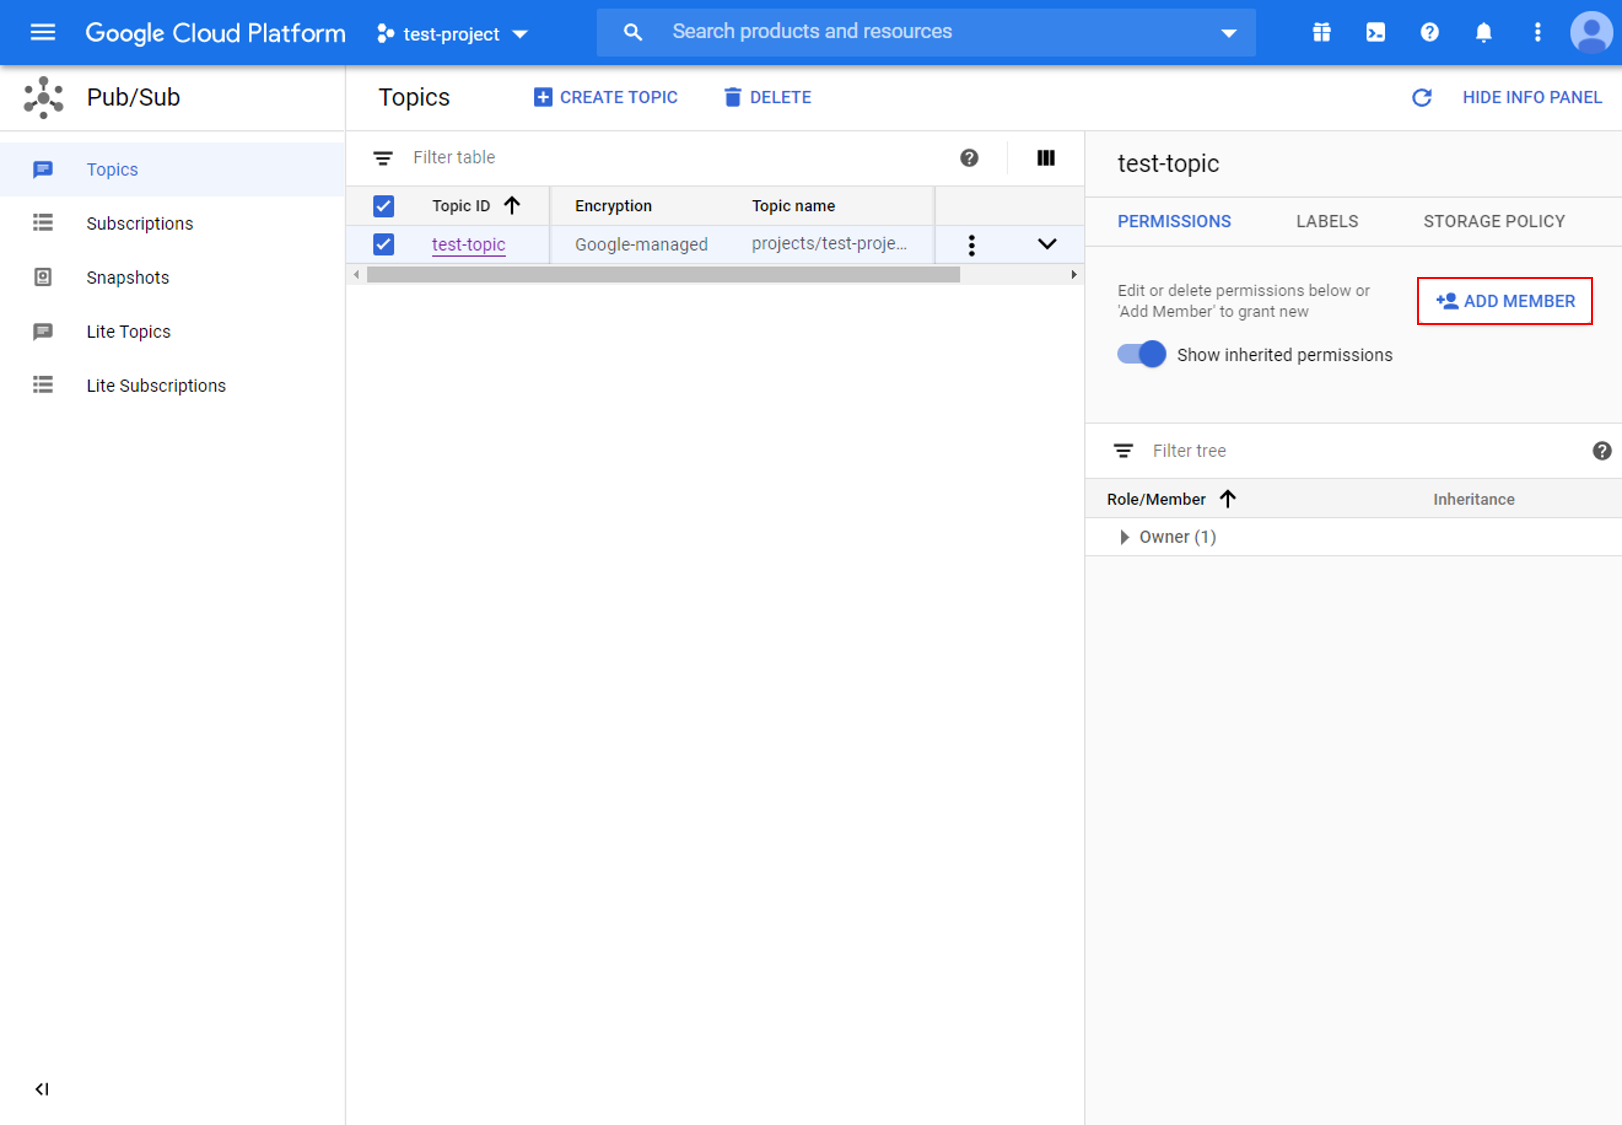
创建主题后,转到面板的权限选项,并添加具有“Pub/Sub Publisher“ cloud-iot@system.gserviceaccount.com”。

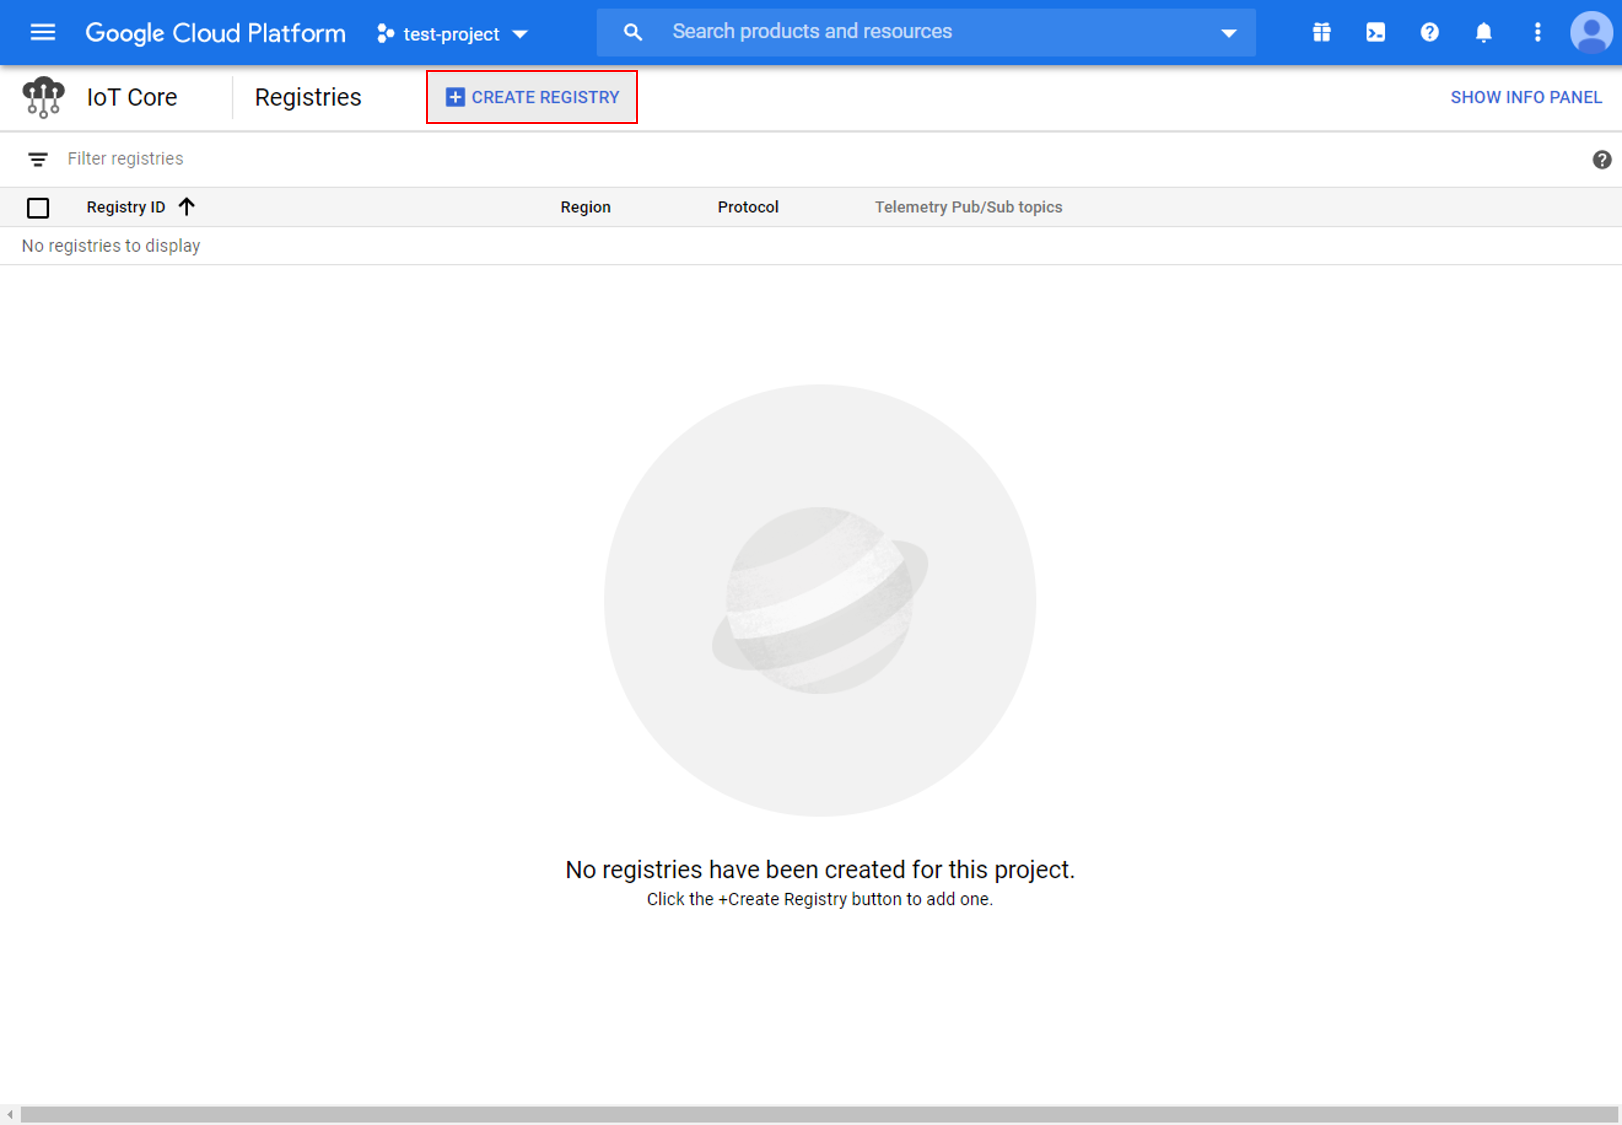
5.创建设备注册
返回IoT Core设置页面并创建一个新注册。

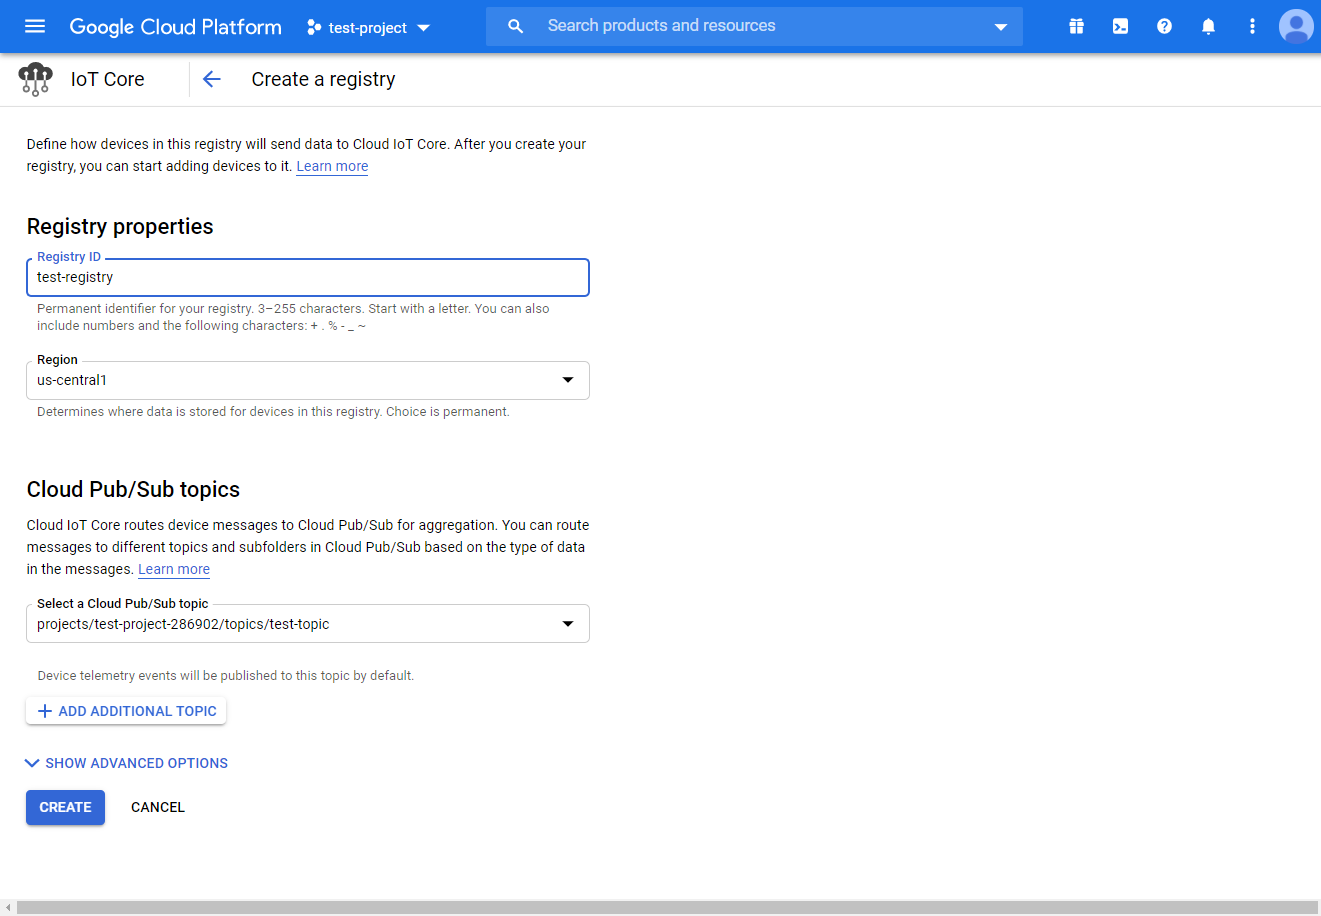
选择合适的Registry ID,然后选择用于存储数据的服务器 Region 。请记住Registry ID和Region,以便以后与Ameba一起使用。
对于Pub/Sub主题,选择在上一步中创建的主题。
6. 创建一对公钥/私钥
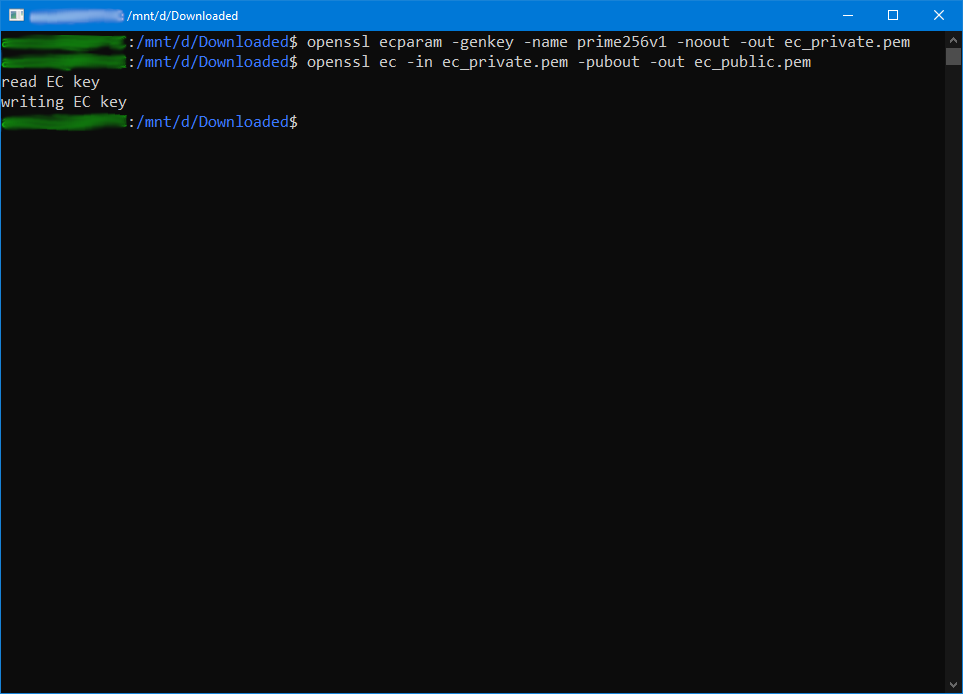
在Windows/Linux/MacOs的终端中使用Openssl,运行以下命令以生成私钥和公钥对。这些命令将创建两个文件,包含私钥的“ec_private.pem”和包含公钥的“ec_public.pem”。
$ openssl ecparam -genkey -name prime256v1 -noout -out ec_private.pem
$ openssl ec -in ec_private.pem -pubout -out ec_public.pem
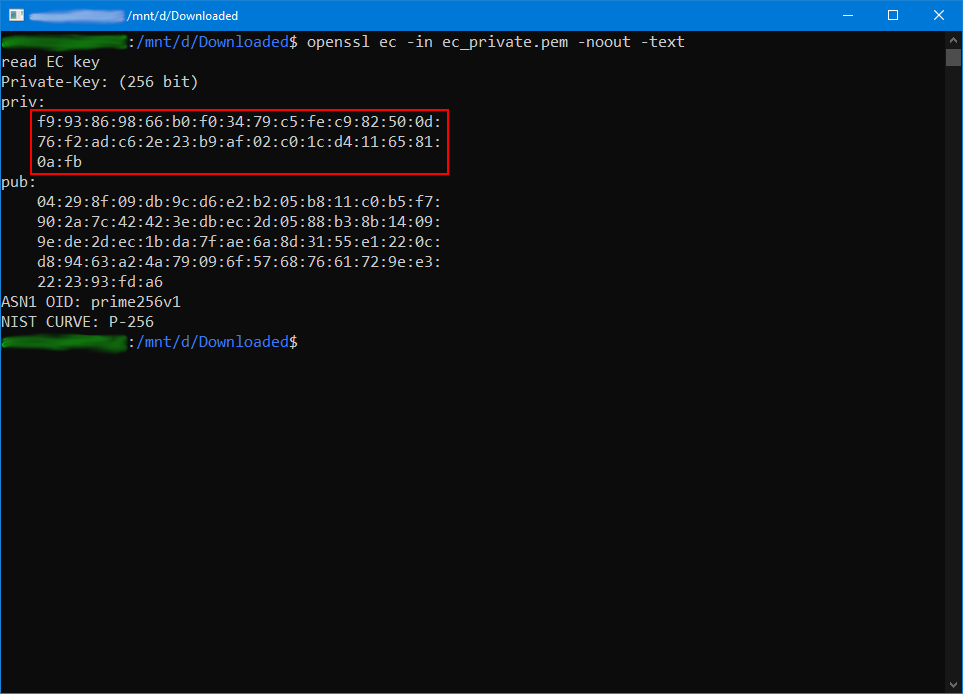
运行下一个命令以提取私钥,并记住标注的十六进制字符串,以供以后与Ameba一起使用。
$ openssl ec -in ec_private.pem -noout -text
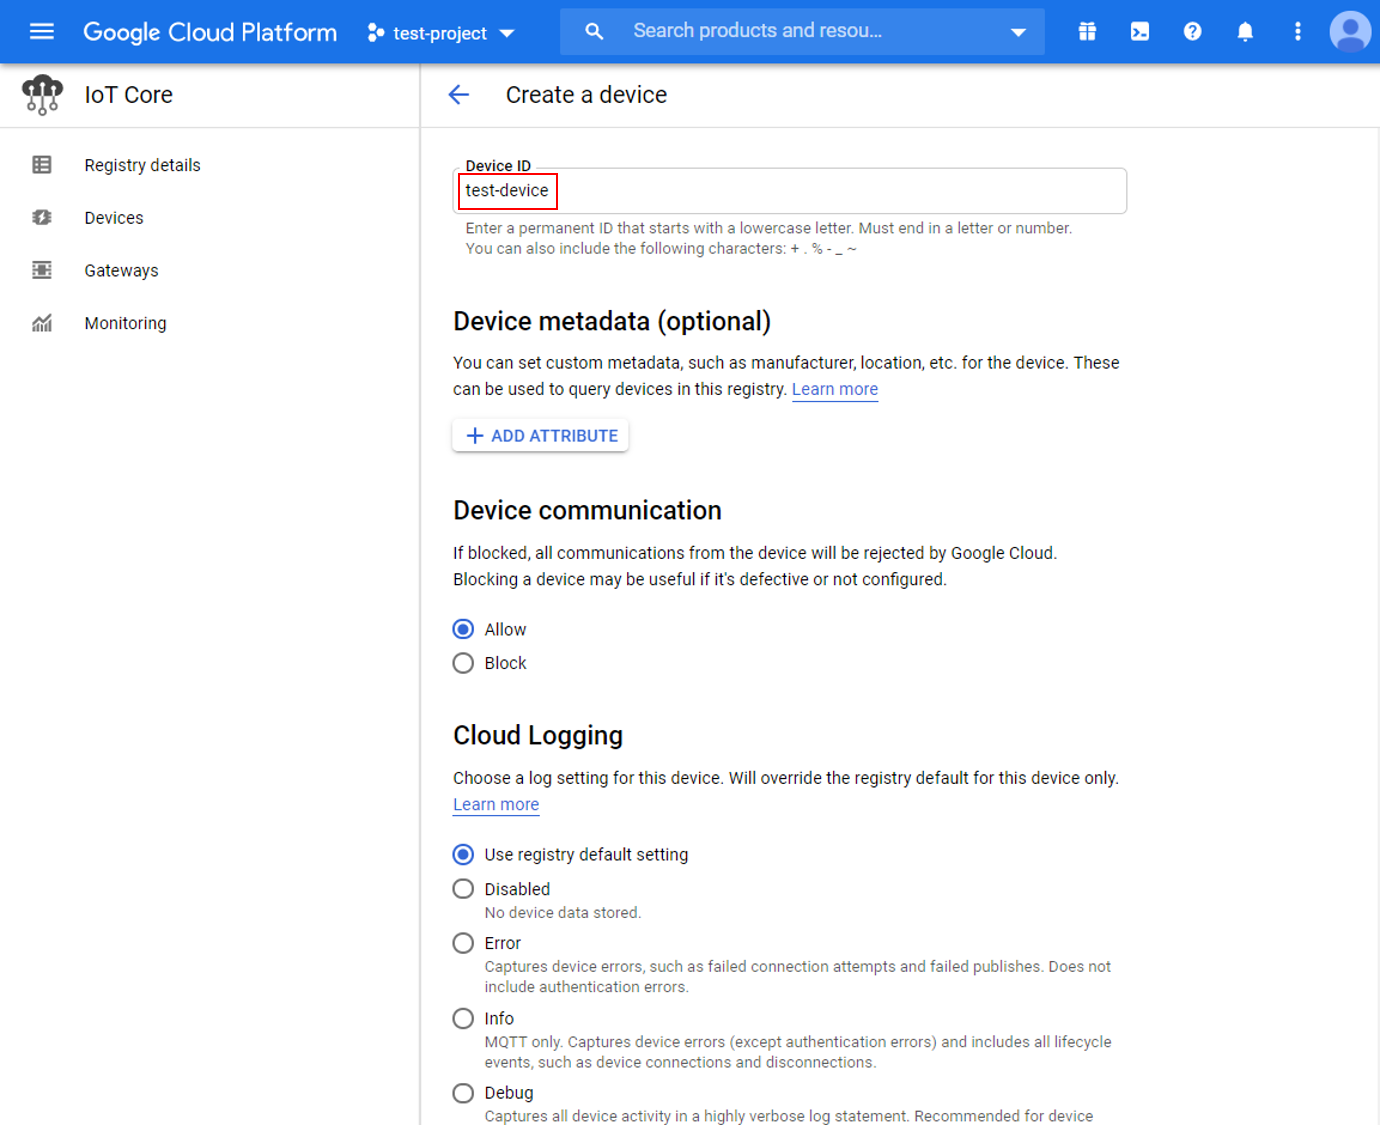
7. 创建一个设备
返回IoT Core设置页面并创建新设备。
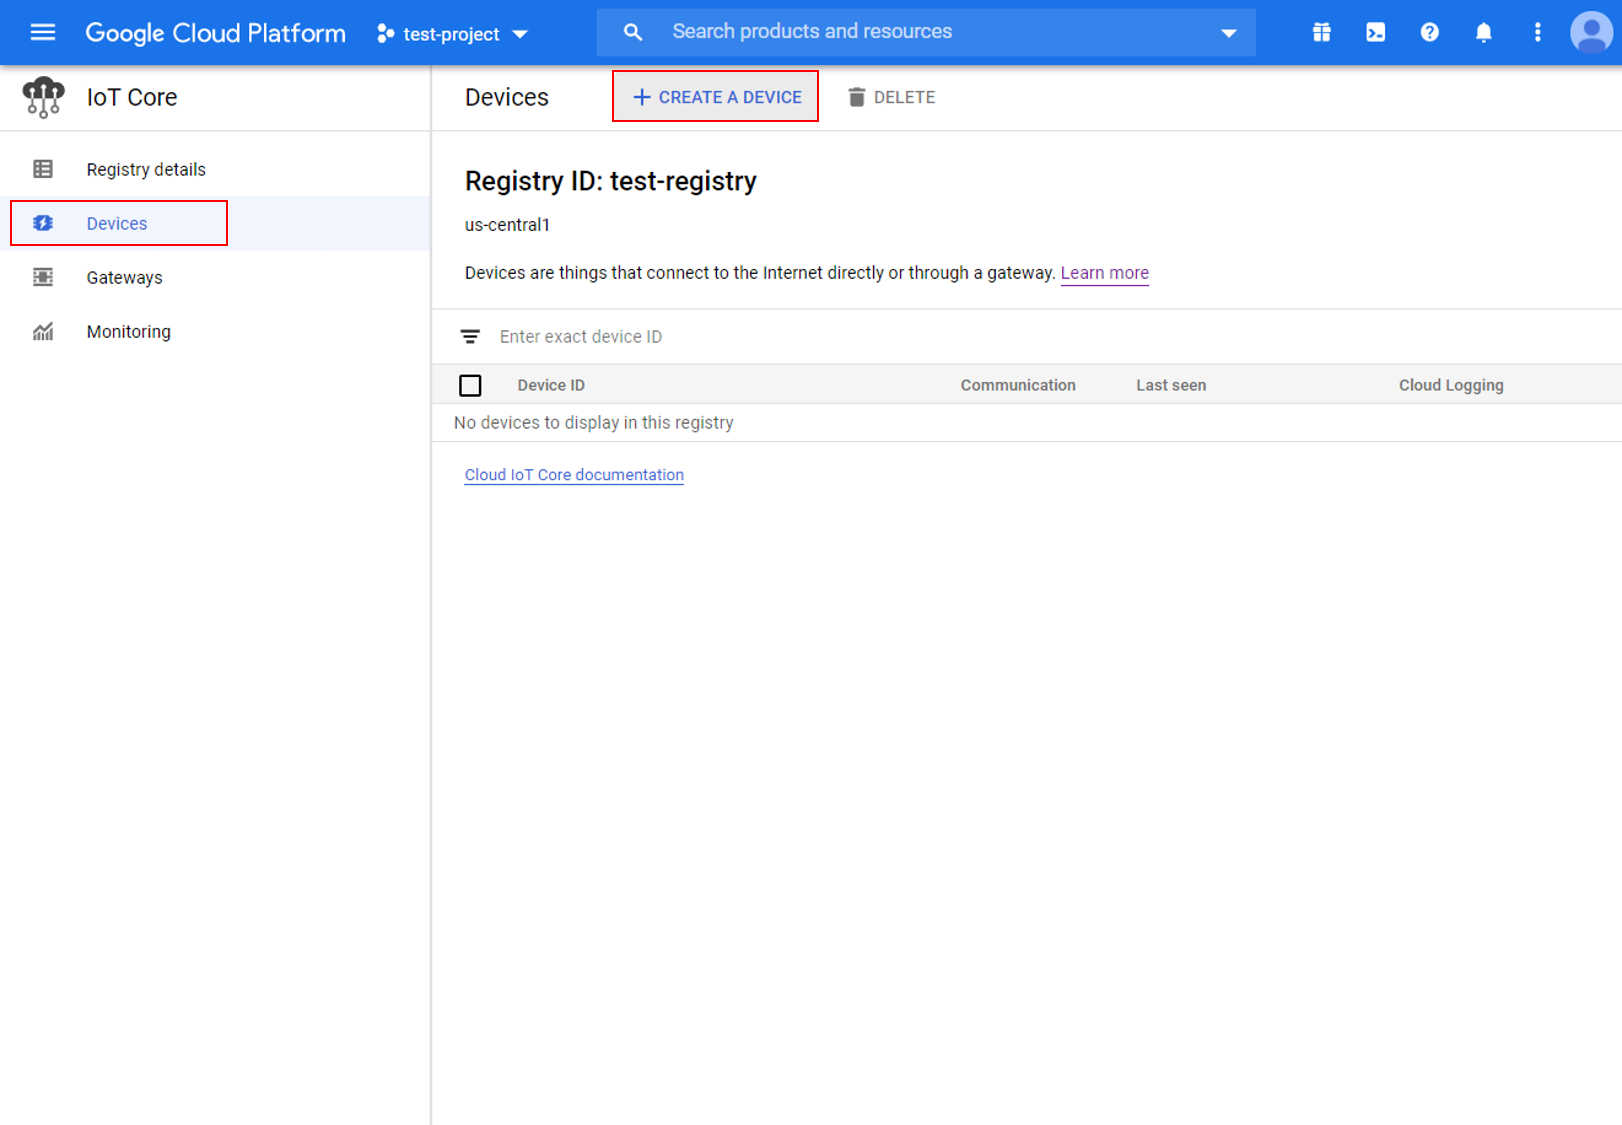
给设备一个合适的Device ID,并记住它以便以后与Ameba一起使用。
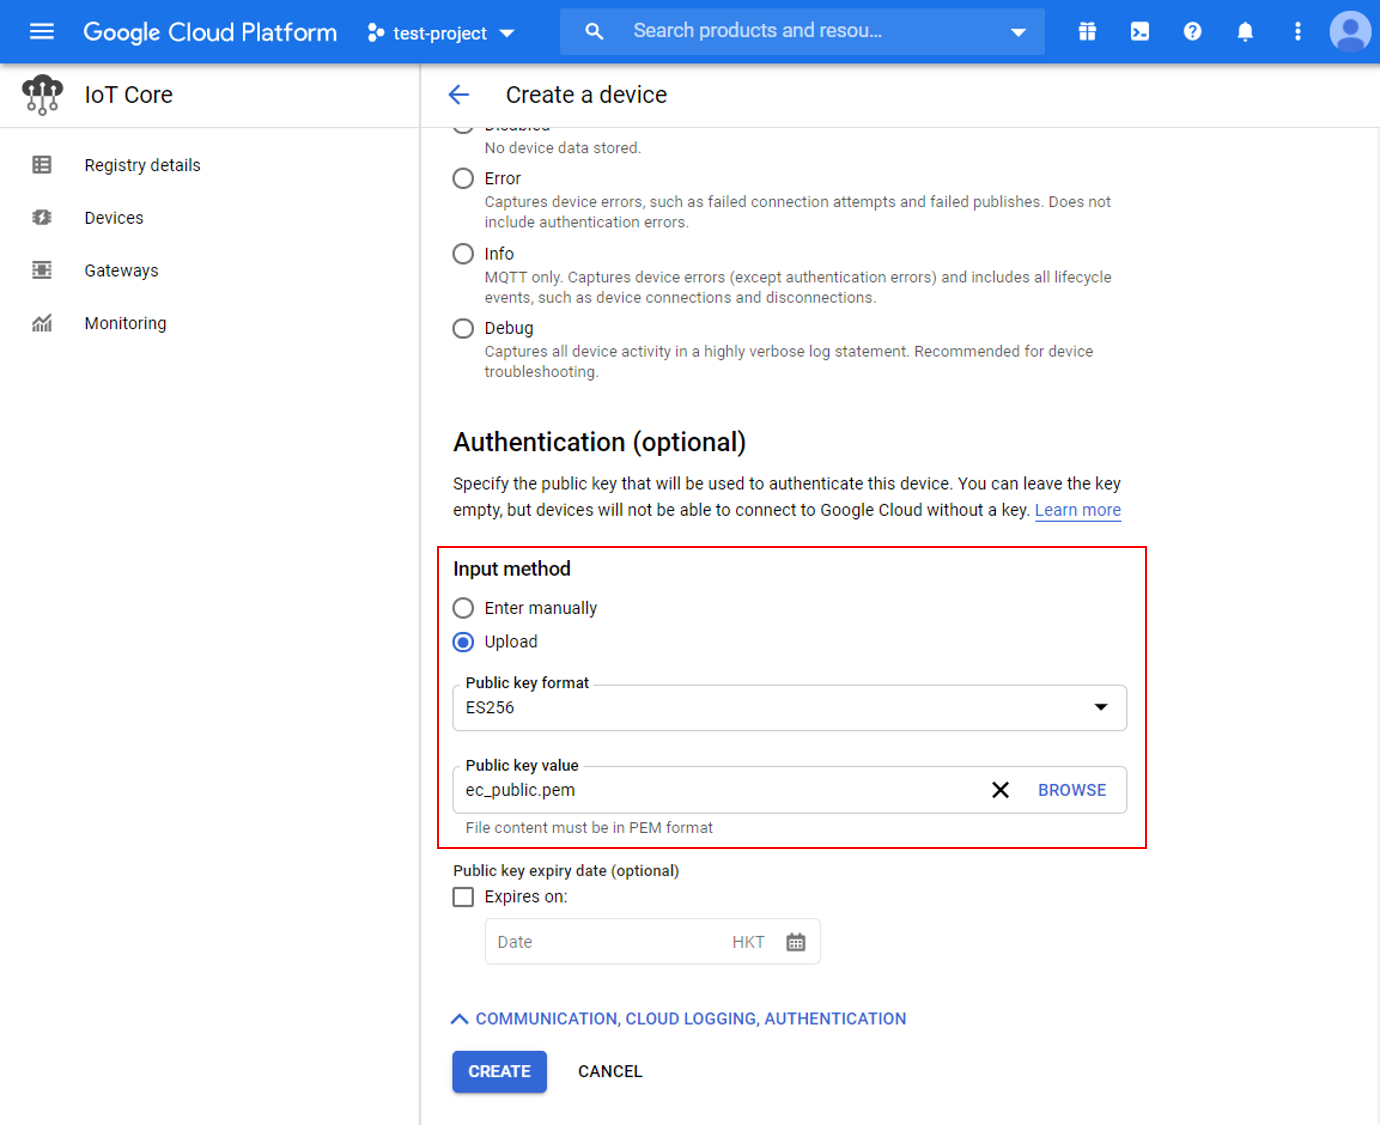
在其他选项的身份验证部分,上载先前生成的“ec_public.pem”公钥。
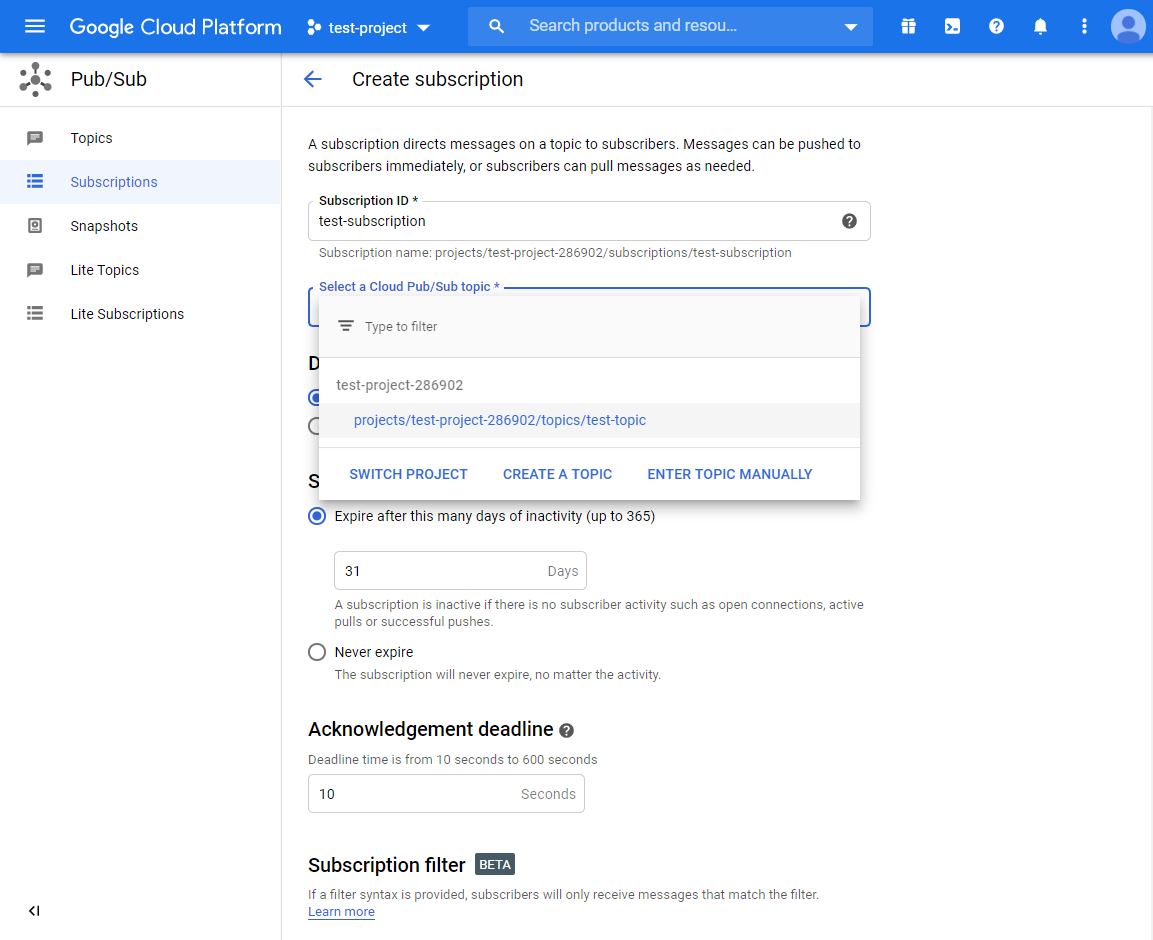
8. 创建Cloud Pub/Sub 订阅
要观察Ameba发送的消息,请在Pub/Sub中创建订阅。
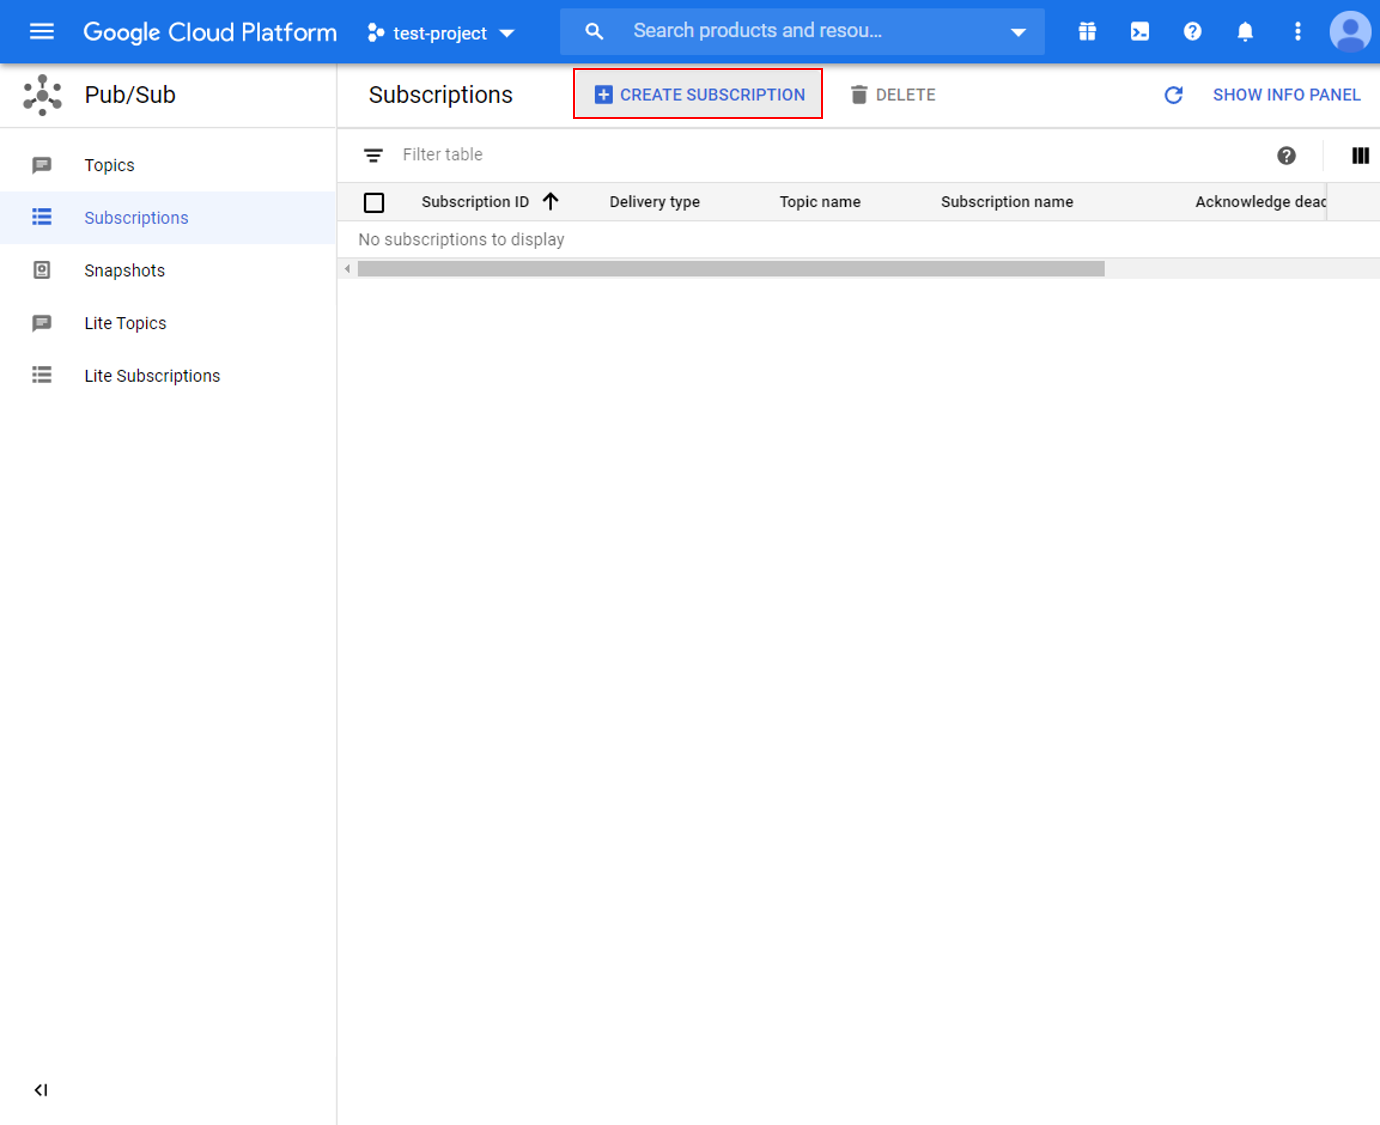
选择一个合适的订阅ID,然后选择以前创建的主题。
范例说明
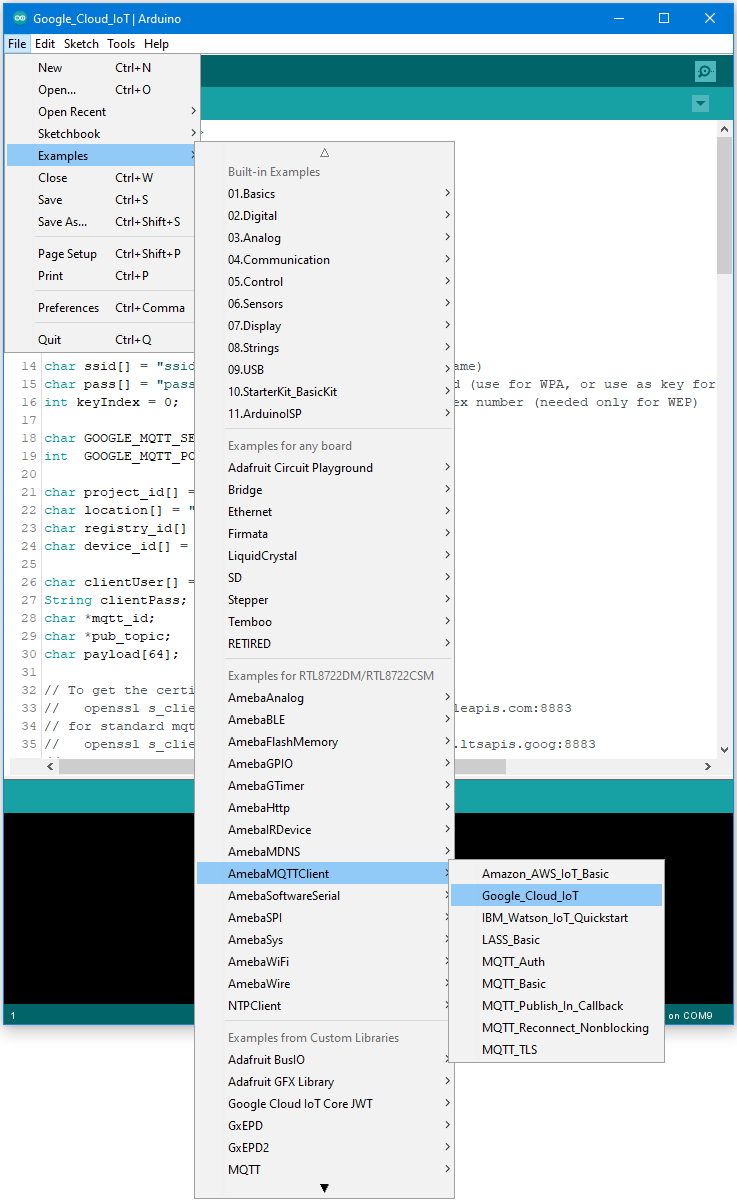
打开范例 “File” -> “Examples” -> “AmebaMQTTClient” -> “Google_Cloud_IoT”。
在下面标注的部分中输入所需的信息。
在下面标注的部分中输入所需的信息。

在黄色部分中,输入连接到WiFi网络所需的SSID和密码。
在绿色部分中,输入之前在Google Cloud控制台中配置的项目ID,服务器区域,Registry ID和Device ID。
在蓝色部分中,输入先前从私钥中提取的十六进制字符串。
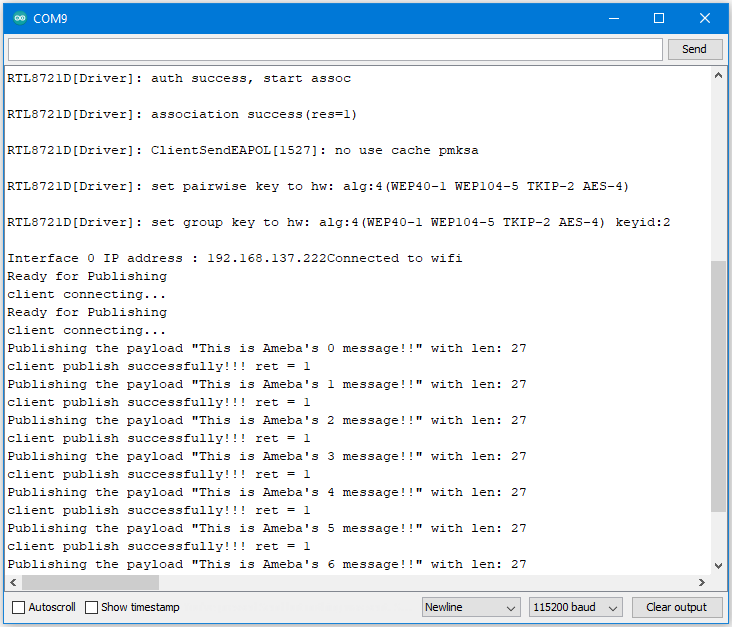
上传代码并在上传完成后按Ameba上的重置按钮。打开串行端口,观察Ameba连接并向Google Cloud IoT发送消息。
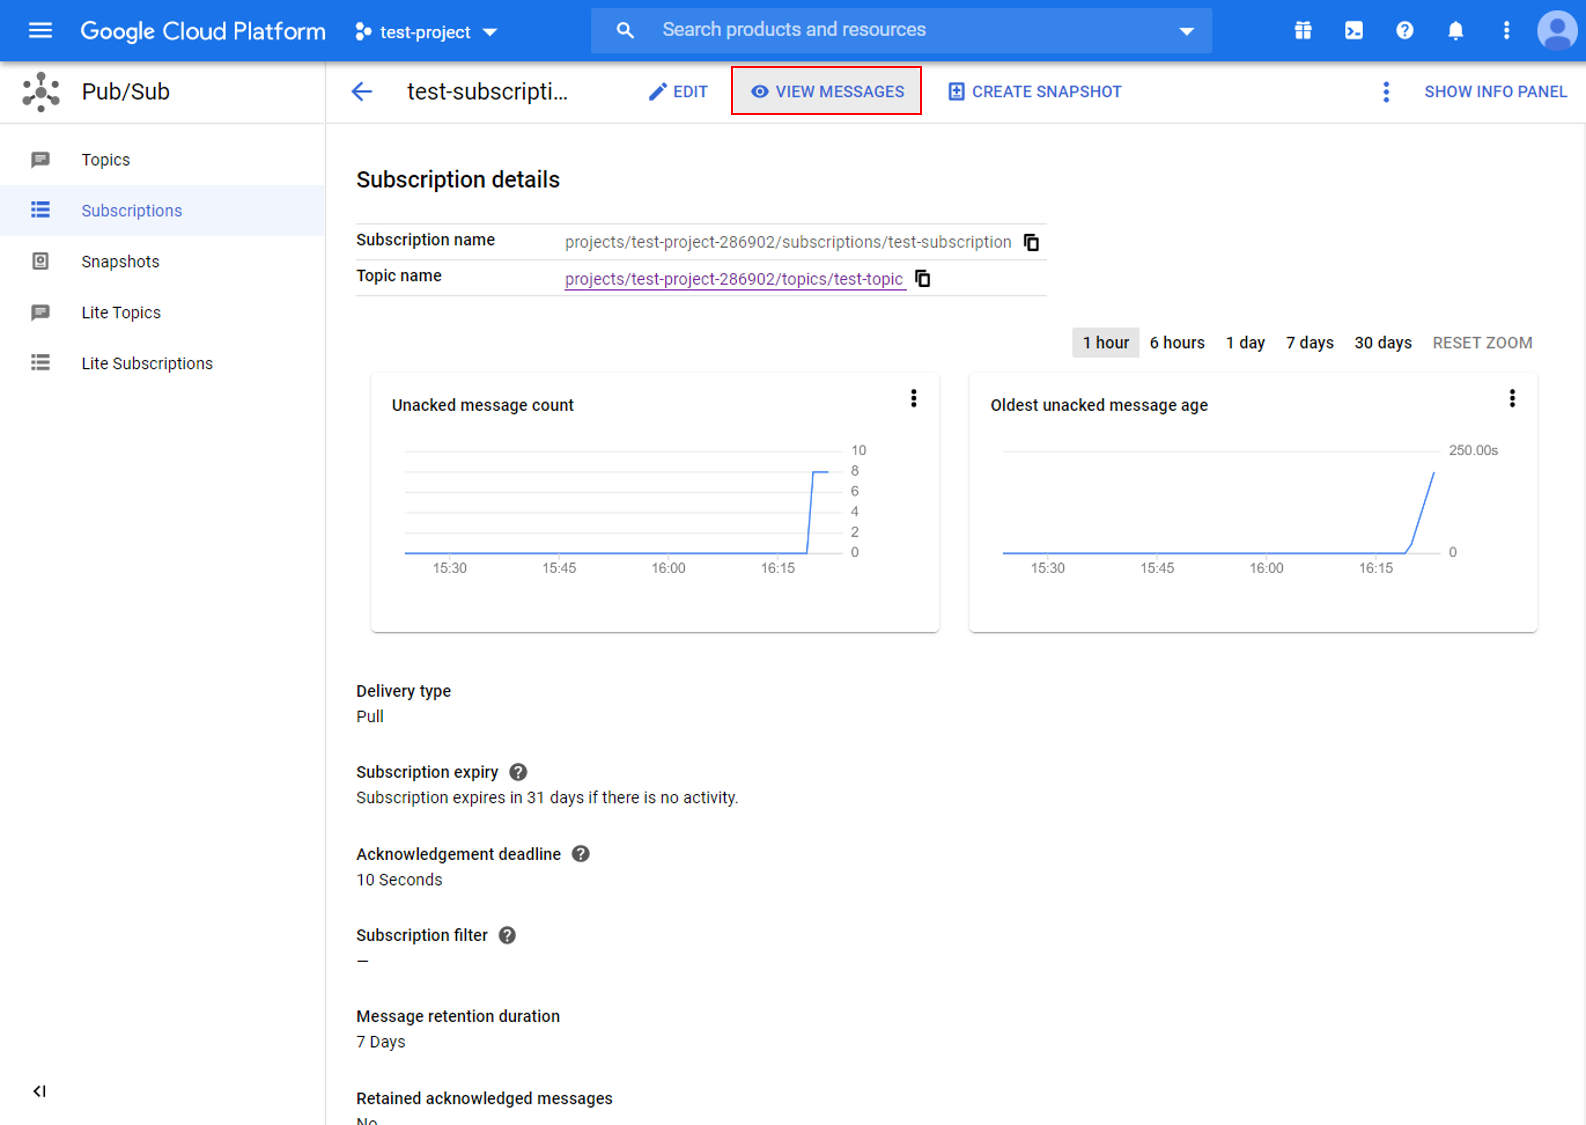
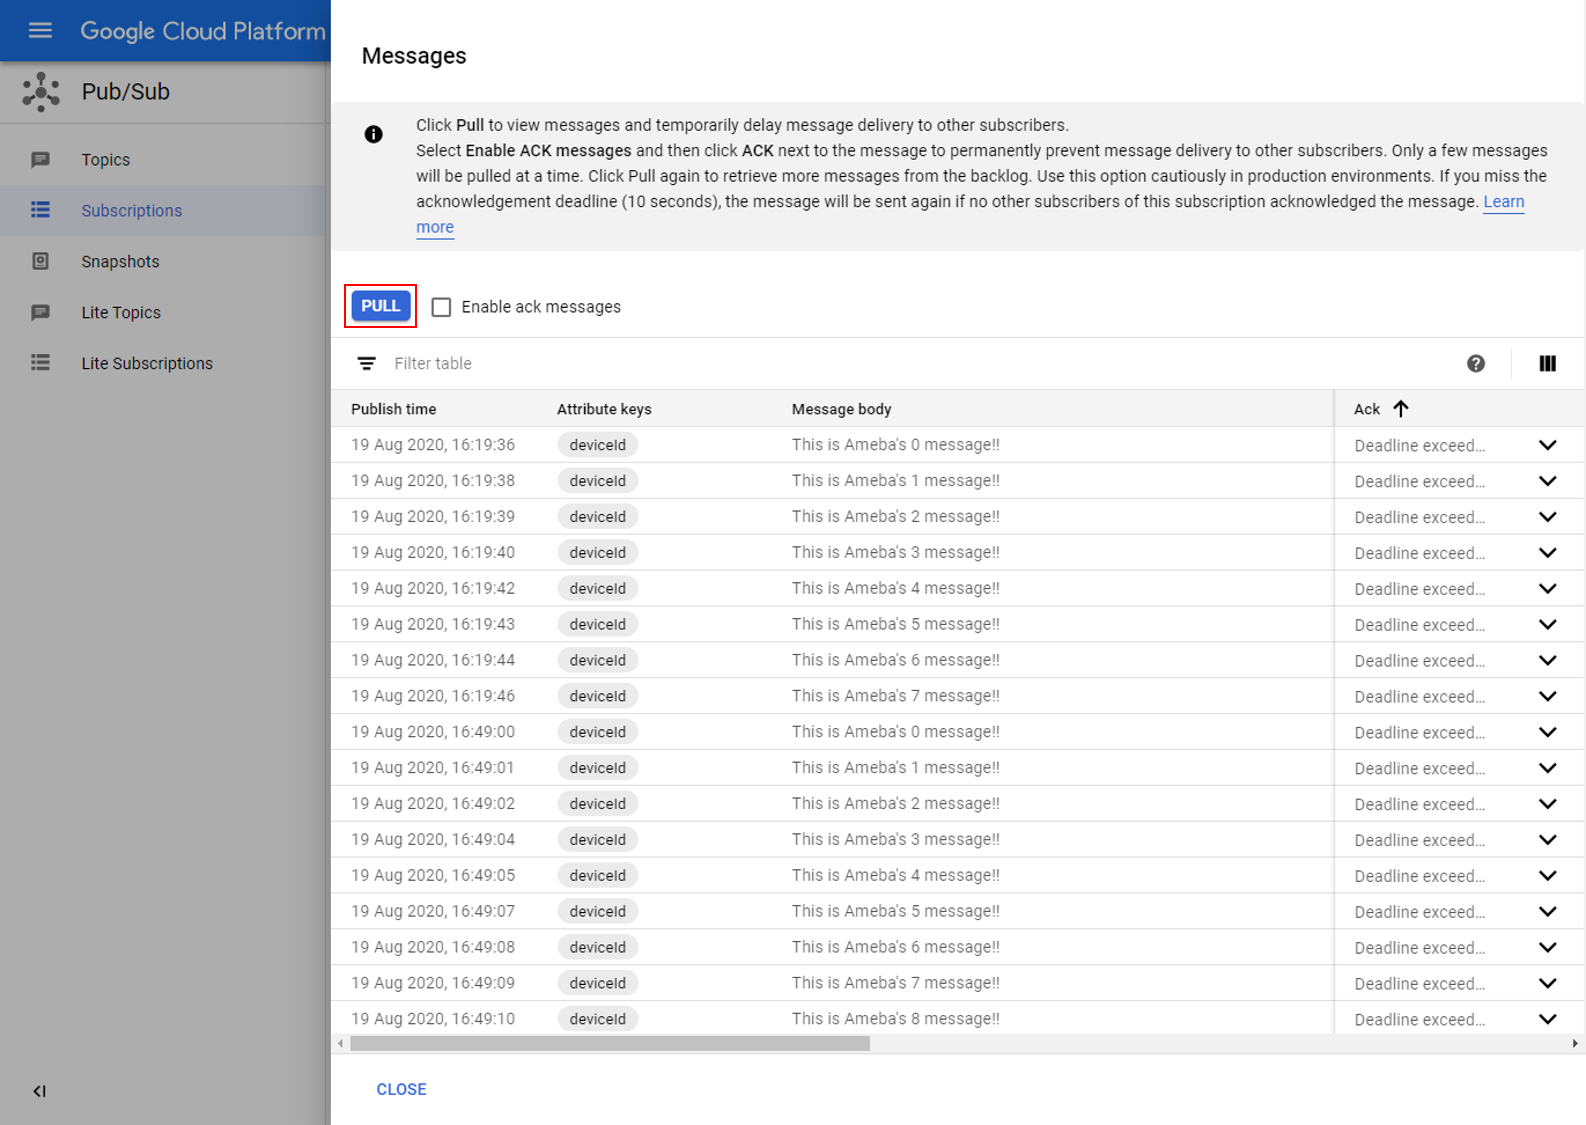
在Google Cloud控制台中,转到Pub/Sub订阅,选择先前创建的订阅,然后单击查看消息。在这里您可以查看Ameba发送的消息。
Code Reference
在setup()中,我们设置了RootCA,这是与Google服务器建立TLS连接所必需的。
wifiClient.setRootCA((unsigned char*)rootCABuff);
在loop()中,每个循环都会检查Internet状态,并在环境出现问题时重新连接到Internet。
if (WiFi.status() != WL_CONNECTED) {
    while (WiFi.begin(ssid, pass) != WL_CONNECTED)
    {
      delay(1000);
    }
    Serial.println("Connected to wifi");
}
要发布消息,需要mqtt_id,clientPass和pub_topic。
通过project ID,服务器位置,registry ID和device ID来生成mqtt_id:
mqtt_id = (char *)malloc(strlen("projects/") + strlen(project_id) + strlen("/locations/us-central1/registries/") + strlen(registry_id) + strlen("/devices/") + strlen(device_id) + 1);
sprintf(mqtt_id, "projects/%s/locations/us-central1/registries/%s/devices/%s", project_id, registry_id, device_id);
clientPass是使用JSON web token(JWT)生成器函数生成的,该函数需要project ID和当前时间,并使用私钥对其进行签名:
clientPass = CreateJwt(project_id, timeClient.getEpochTime(), priv_key);
pub_topic是通过project ID和主题生成的:
pub_topic = (char *)malloc(strlen("/devices/") + strlen(device_id) + strlen("/events") + 1);
sprintf(pub_topic, "/devices/%s/events", device_id);
MQTT Server 设定:
client.setServer(GOOGLE_MQTT_SERVER, GOOGLE_MQTT_PORT);
client.setPublishQos(MQTTQOS1);
client.waitForAck(true);
连接到Google Cloud并发布消息:
if (client.connect(mqtt_id, clientUser, clientPass.c_str()) )
 {
. . . . . . . . . .
for(int i = 0; i < count; i++){
     . . . . . . . . . .
     sprintf(payload, "This is Ameba's %d message!!", i);
     ret = client.publish(pub_topic, payload);
     . . . . . . . . . .
 }
. . . . . . . . . .
   client.disconnect();
 }
 free(mqtt_id);
 free(pub_topic);
