Ameba provides Xively-related API to support cloud storage feature.
Preparation
- Ameba x 1
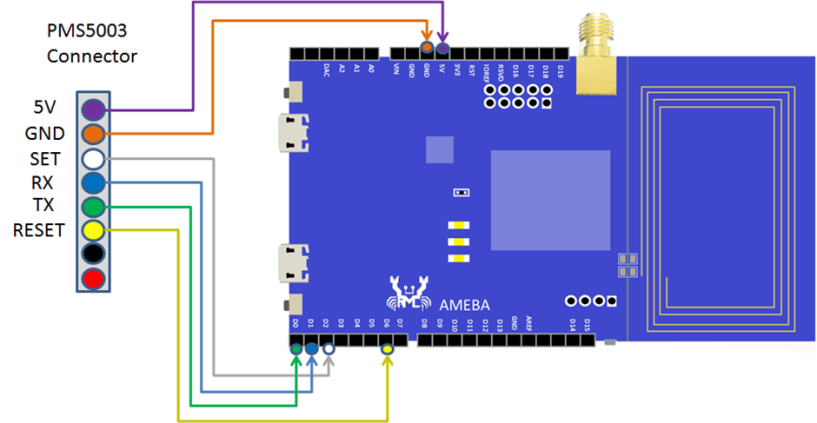
- PlanTower PMS3003 (or PMS5003) x 1
To connect the PMS3003 (or PMS5003) to Ameba, please refer to example: Detect PM2.5 Concentration In The Air。
Below is the RTL8710 Wiring Diagram: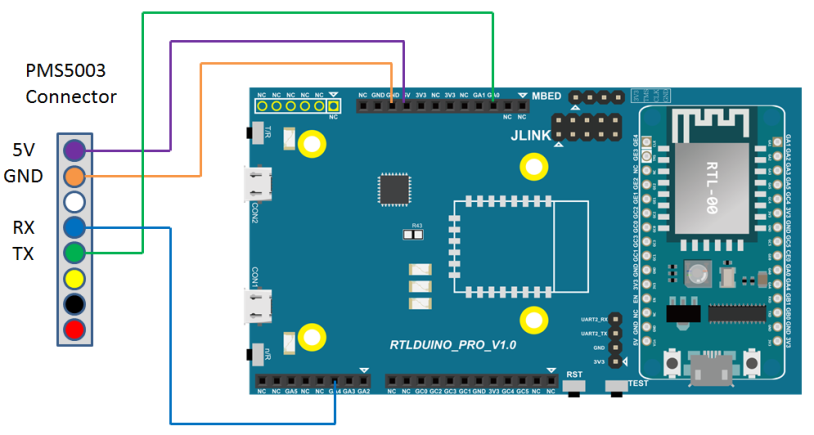
If you don’t have an Xively account, please register one here: https://personal.xively.com/signup/
- Add device
In “DEVELOP” tab, click “Add Device”.
- Get Feed ID and API Key
After the device is added, some related information is shown on the page. “Feed ID” and “API key” will be used in this example.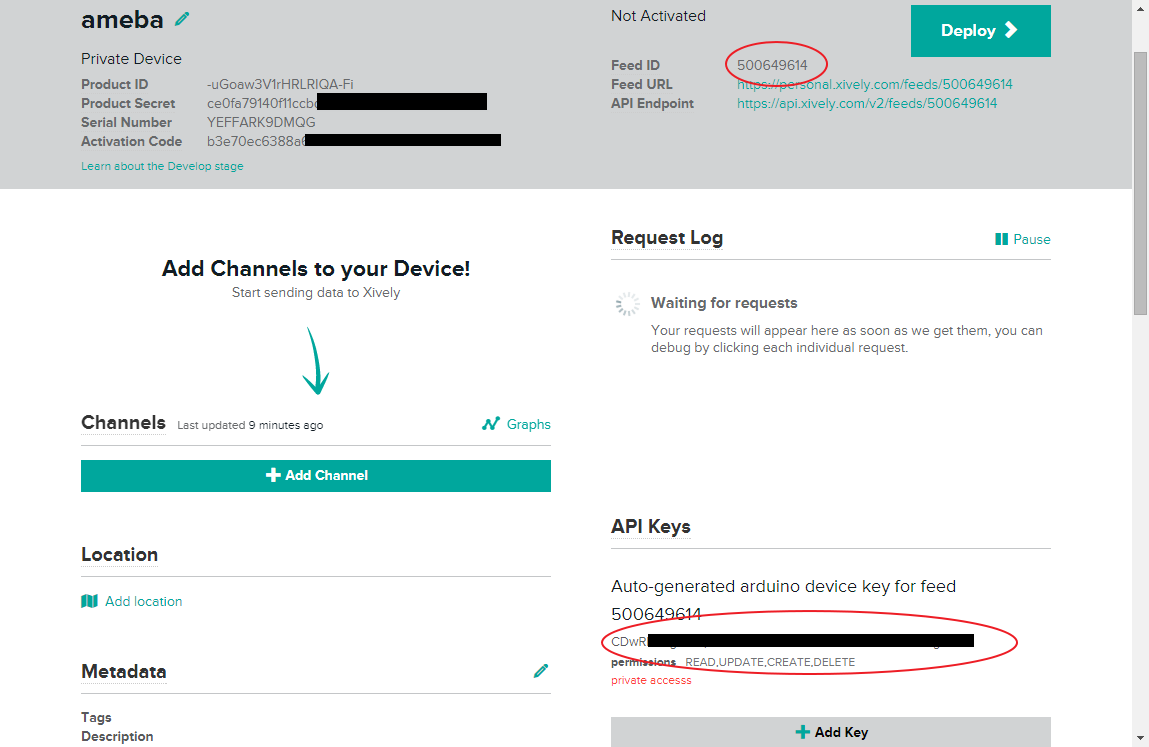
Here we will describe the data format we defined for Ameba to communicate with Xively android App.
Take PMS3003 (or PMS5003) for example, it provides 3 types of data, that is PM1.0, PM2.5 和PM10. Therefore, PMS3003 requires 4 Xively channels to store its data.
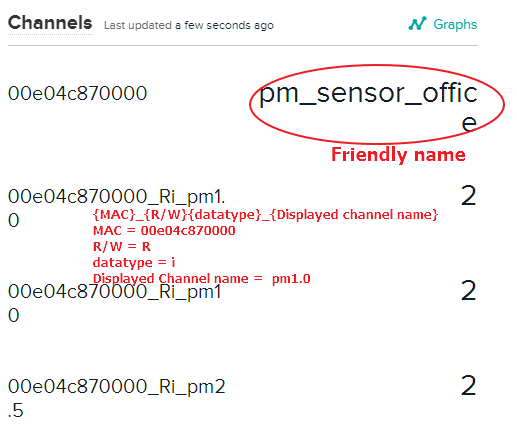
- Setting a “Friendly name” of the device
Each device requires a channel for its “Friendly name”, which is used to display in the Android App and to identify this device.
Format: {Channel Name: MAC Address of the device, Value: its friendly name}
- Setting the data of the device
The channel for device to store data consists of 4 parts:
{MAC(12)}_{R/W(1)}{datatype(1)}_{displayed channel name}
MAC: MAC Address of the device
R/W: Access permission of App (R: read only; W: write and read)
Datatype: The type of stored data, currently support 4 data types: i/f/s/t (i: integer; f: float; s: string; t: on/off)
Displayed channel name: The name for this data to display in App.
- An example
Example
First make sure current board is set to Ameba in “Tools” -> “Board” -> “Arduino Ameba”.
Open the Upload PM2.5 Data example, “File” -> “Examples” -> “AmebaXively” -> “WiFiUploadPM2.5Data”
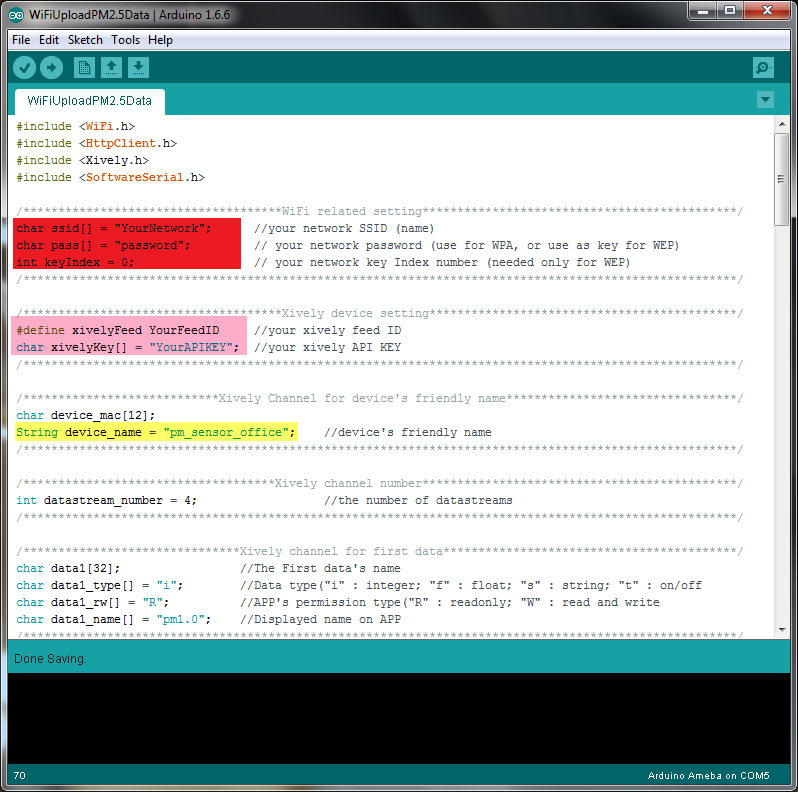
First we have to connect Ameba to the Internet, fill in required information such as ssid, password, …, etc.
The code highlighted in red is the settings related to Internet connection.
The code highlighted in pink is the settings related to Xively, here please replace “YourFeedID” with your Feed ID, and replace “YourAPIKEY” with your API Key.
The code highlighted in yellow is the friendly name of the device, you can pick a name for your device.
Compile and upload to Ameba, then press the reset button. Open the Serial Monitor to see the data which is uploaded.
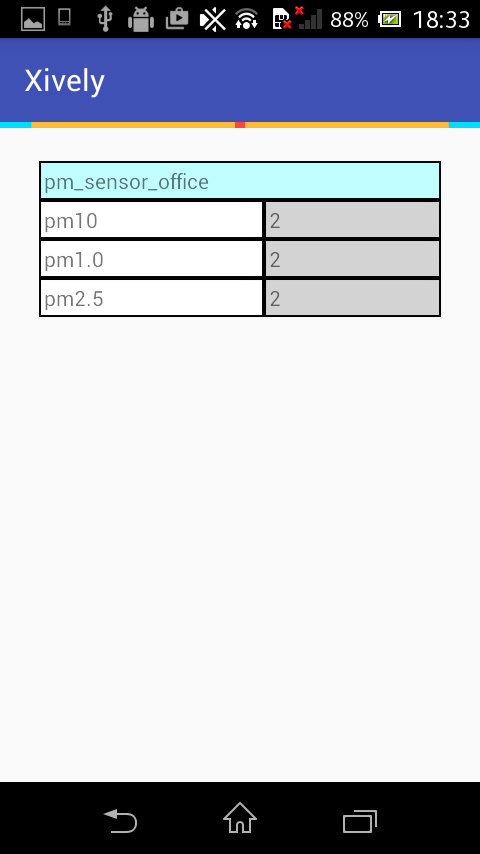
Open the Xively webpage to see the value of upoaded data:
In “My Cloud” App, login to your Xively account and retrieve the data uploaded by Ameba.
If you can not find “My Cloud” app in Google Play, please download it here: My Cloud
- Add a cloud account
Currently, “My Cloud” only support Xively, other cloud service such as Firebase will be supported soon.
Click the “+” icon to add an account and enter your username and password.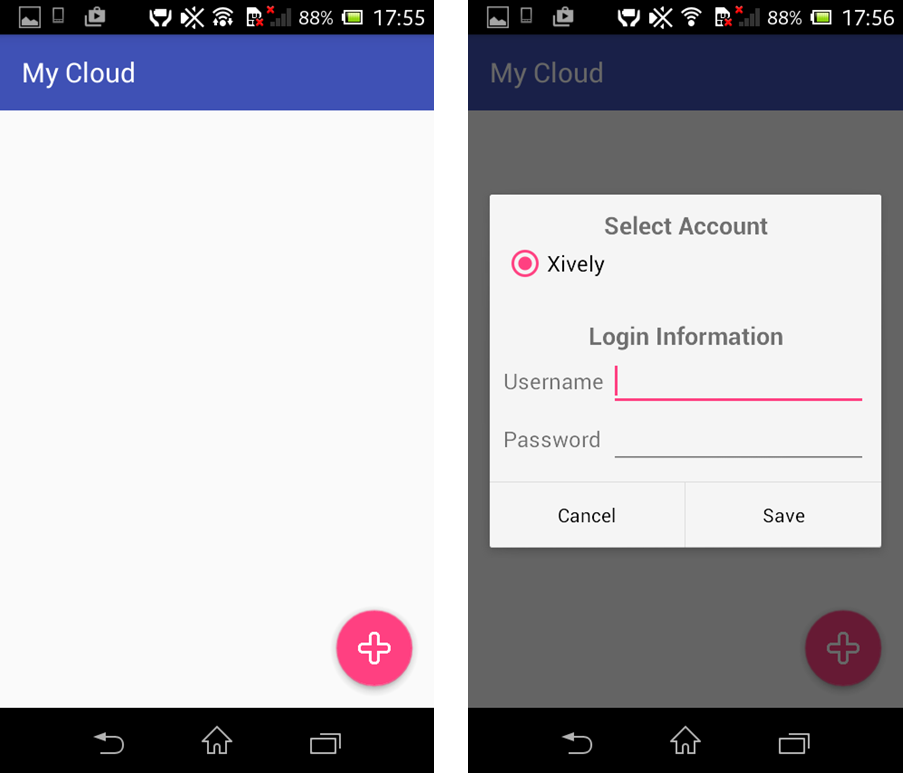
You can see an Xively icon in the app after you add an account successfully.
- Delete account or change account name
Long-press the icon to delete account or to change account name.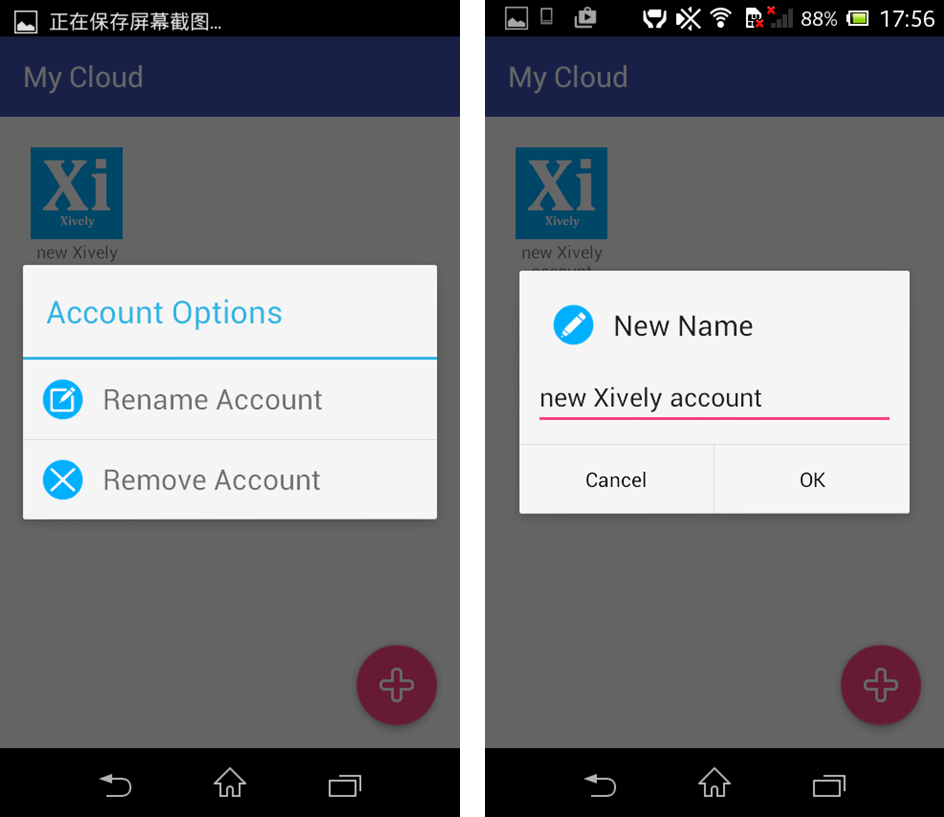
- Read data in the Xively account
Click on the icon of the account you want to read date from.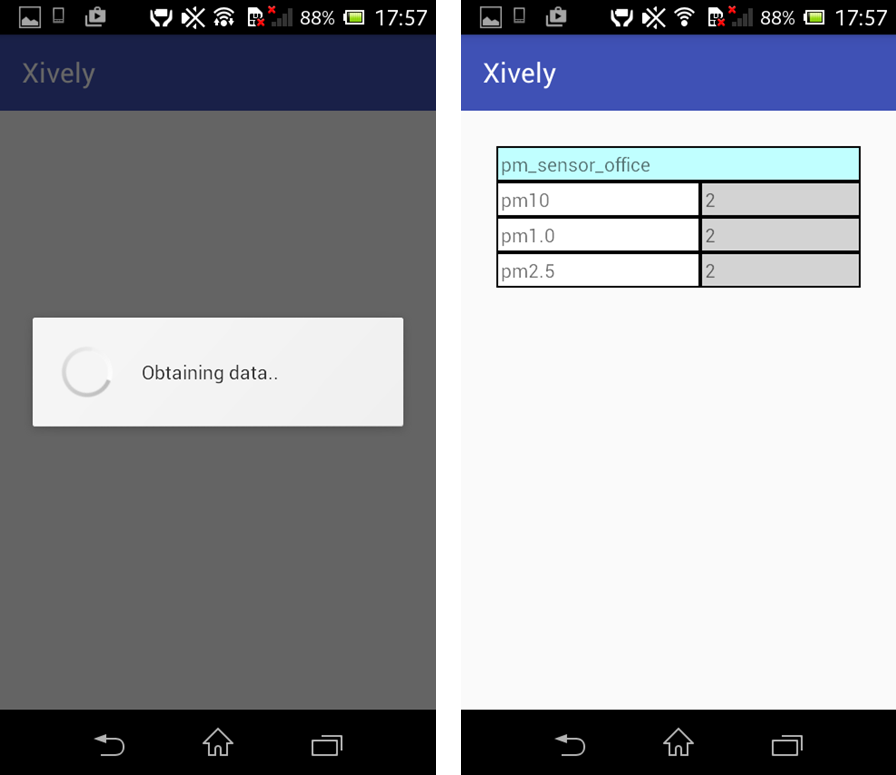
- Update data
Swipe down the screen to update the data.