Materials
- Ameba x 1
- Laptop(Make sure it is connected to the same network domain as Ameba, and tcp tools are installed.
Example
In this example, we first connect Ameba to WiFi, then we use Ameba as server to communicate with client.
First, we make sure the board is set to Ameba in “Tools” -> “Board” -> “Arduino Ameba”

Then, open up the Simple WiFi Server example in “File” -> “Examples” -> “AmebaWiFi” -> “SimpleServerWiFi”
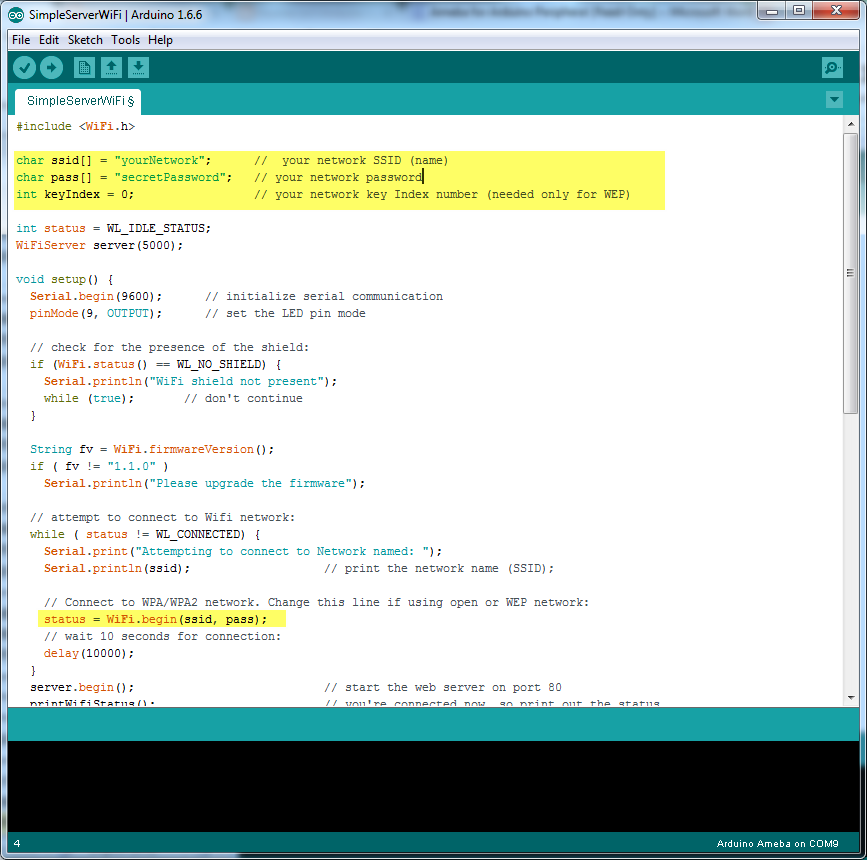
In the sample code, we modify the parameters concerning the WiFi connection, please set the parameters according to your WiFi connection.
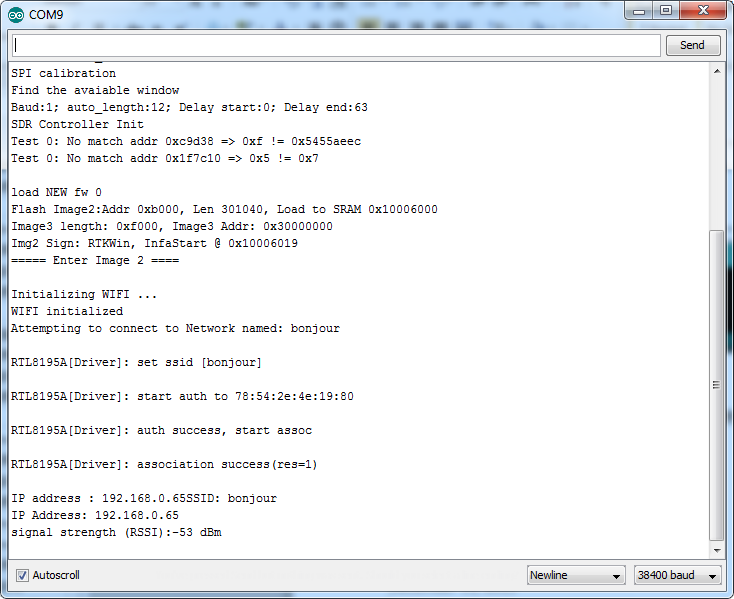
Next, upload the code, then press the reset button on Ameba. At this moment, you will see the connection information is displayed in the console.
Next, we use the socket tool in the laptop to be the client, and connect to the Ameba server via the IP and port we set in the code. (Note: The socket tool we used in this example is “sokit”.)
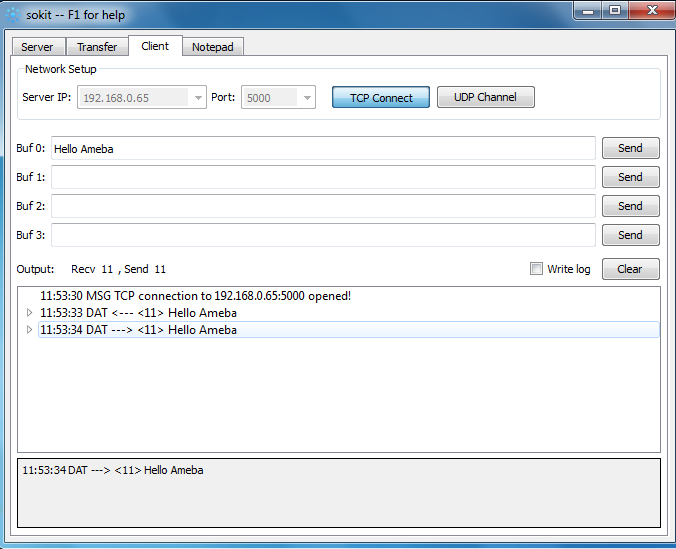
Click on the “Client” tab to choose the client mode, specify the IP and port of the server, then click “TCP Connect”.
If the connection is established successfully, the server shows a message: “A client connected to this Server”, and the IP and port of the connected client.
In this example, when the client and server are connected and the client sends a string to Ameba server, the Ameba server returns the identical string back to the client.
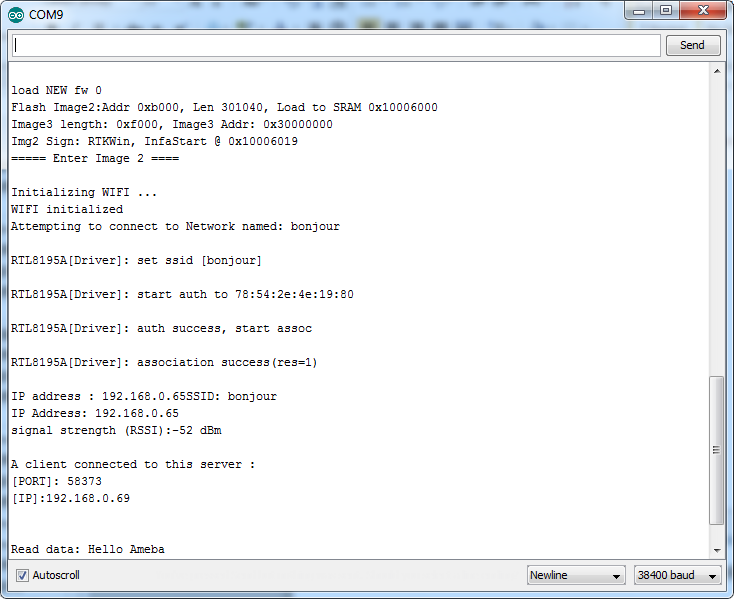
The string sent to server is returned and showed at the client side.
Code reference
https://www.arduino.cc/en/Reference/WiFiBegin
To get the information of a WiFi connection:
Use WiFi.SSID() to get SSID of the current connected network.
https://www.arduino.cc/en/Reference/WiFiSSID
Use WiFi.RSSI() to get the signal strength of the connection.
https://www.arduino.cc/en/Reference/WiFiRSSI
Use WiFi.localIP() to get the Ameba WiFi shield’s IP address.
https://www.arduino.cc/en/Reference/WiFiLocalIP
Create server and transmitting data:
Use Server(port) to create a server that listens on the specified port.
https://www.arduino.cc/en/Reference/WiFiServer
Use server.begin() to tell the server to begin listening for incoming connections.
https://www.arduino.cc/en/Reference/WiFiServerBegin
Use server.available() to get a client that is connected to the server and has data available for reading.
https://www.arduino.cc/en/Reference/WiFiServerAvailable
Use client.read() to read the next byte received from the server.
https://www.arduino.cc/en/Reference/WiFiClientRead
Use client.write() to write data to the server.
https://www.arduino.cc/en/Reference/WiFiClientWrite
Use client.stop() to disconnect from the server.
https://www.arduino.cc/en/Reference/WiFIClientStop
